Assign Group Session Schedules directly to the patient chart using the designated tab. Assigning a Schedule automatically adds the patient as an attendee to all sessions included in the schedule when the group session is started.
Note: You can easily discontinue a schedule as the patient's treatment needs change.
Assign a Schedule
Schedules are assigned using the Add Form button within the Patient Process tab selected in the Schedule Template.
Important: For organizations using the Scheduler, Schedules are assigned to the patient directly from the Scheduler tab.
To assign a schedule:
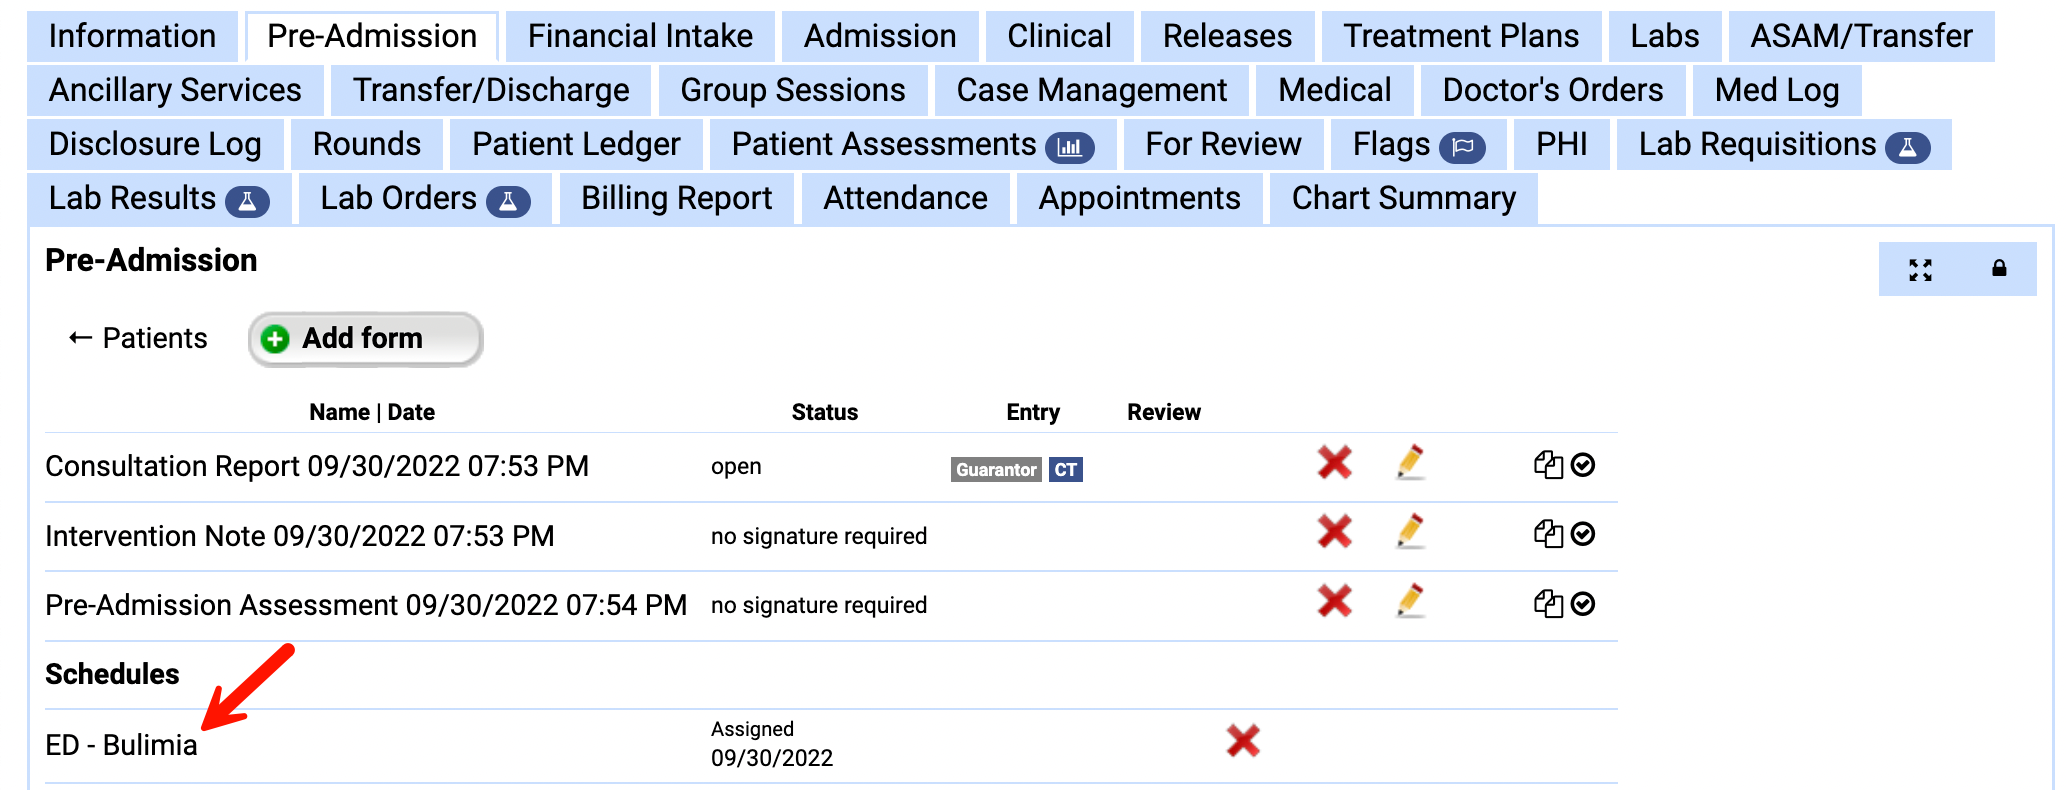
- From the patient chart, open the tab where the schedule has been assigned.
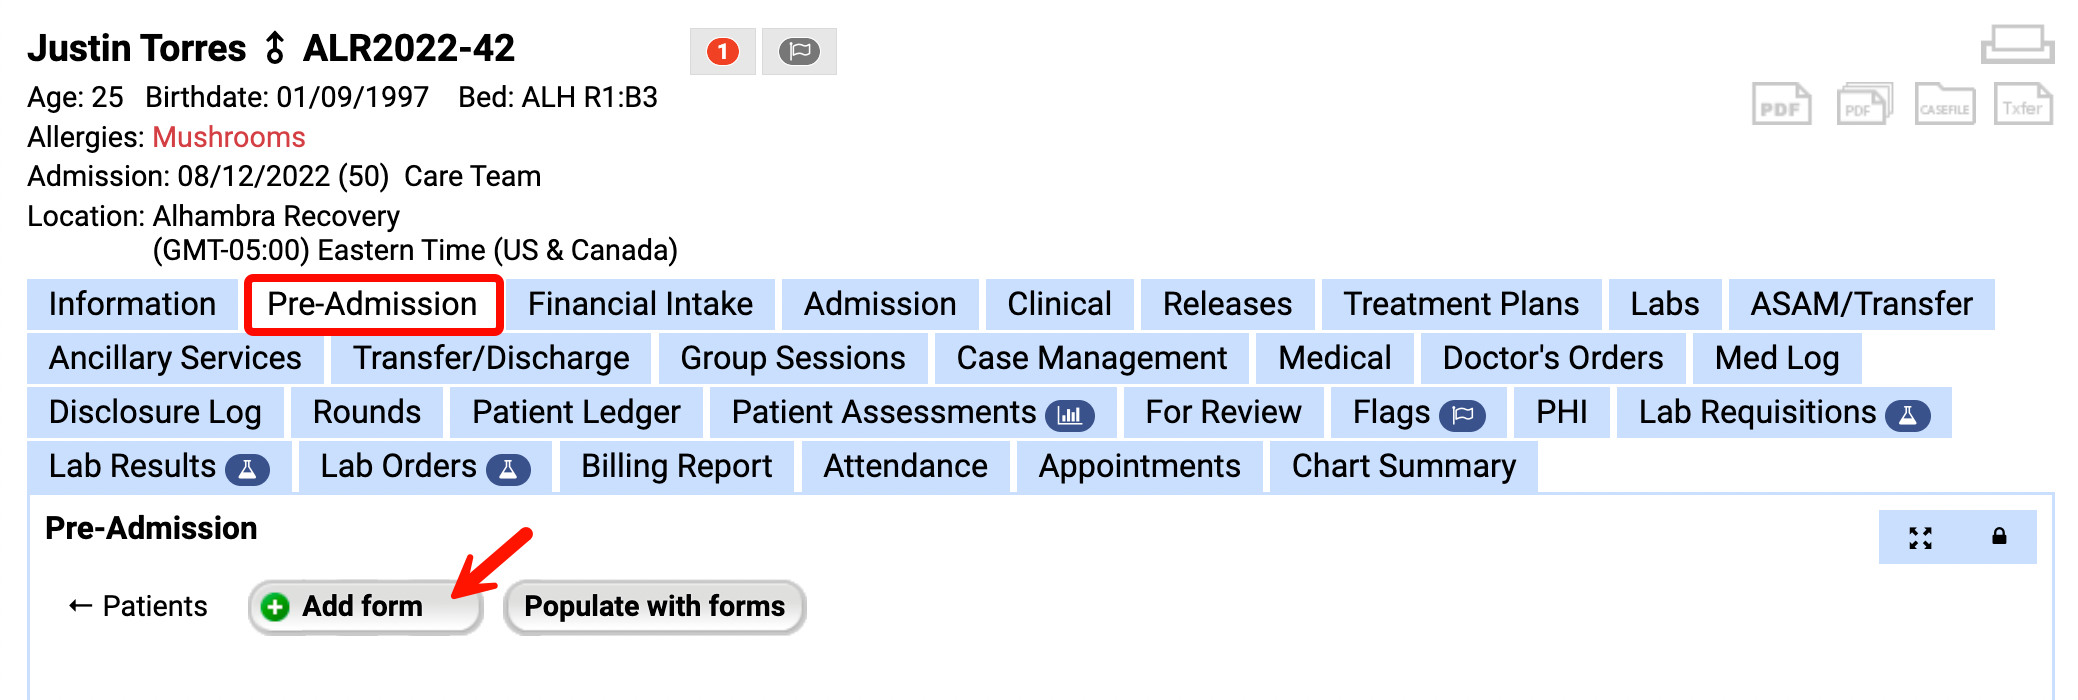
- Click Add Form.
- Choose the Schedule by clicking Add.
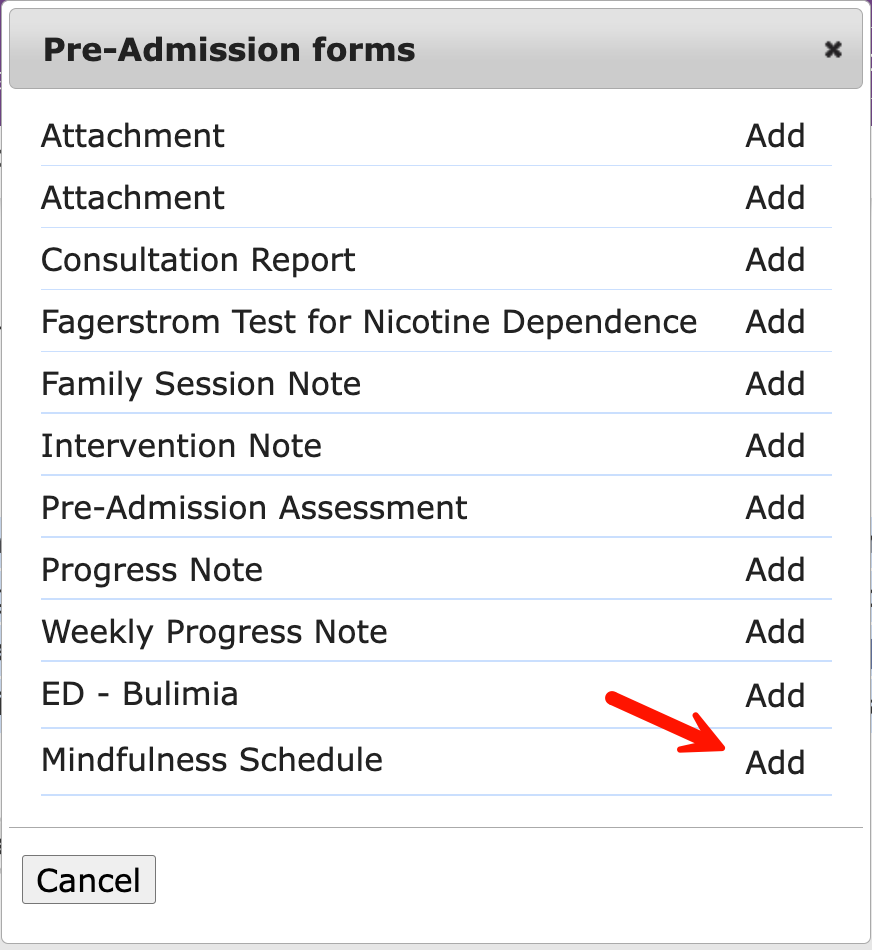
- Schedules will be listed at the bottom of the page, after all other forms.

- You can assign the patient to as many schedules as needed.

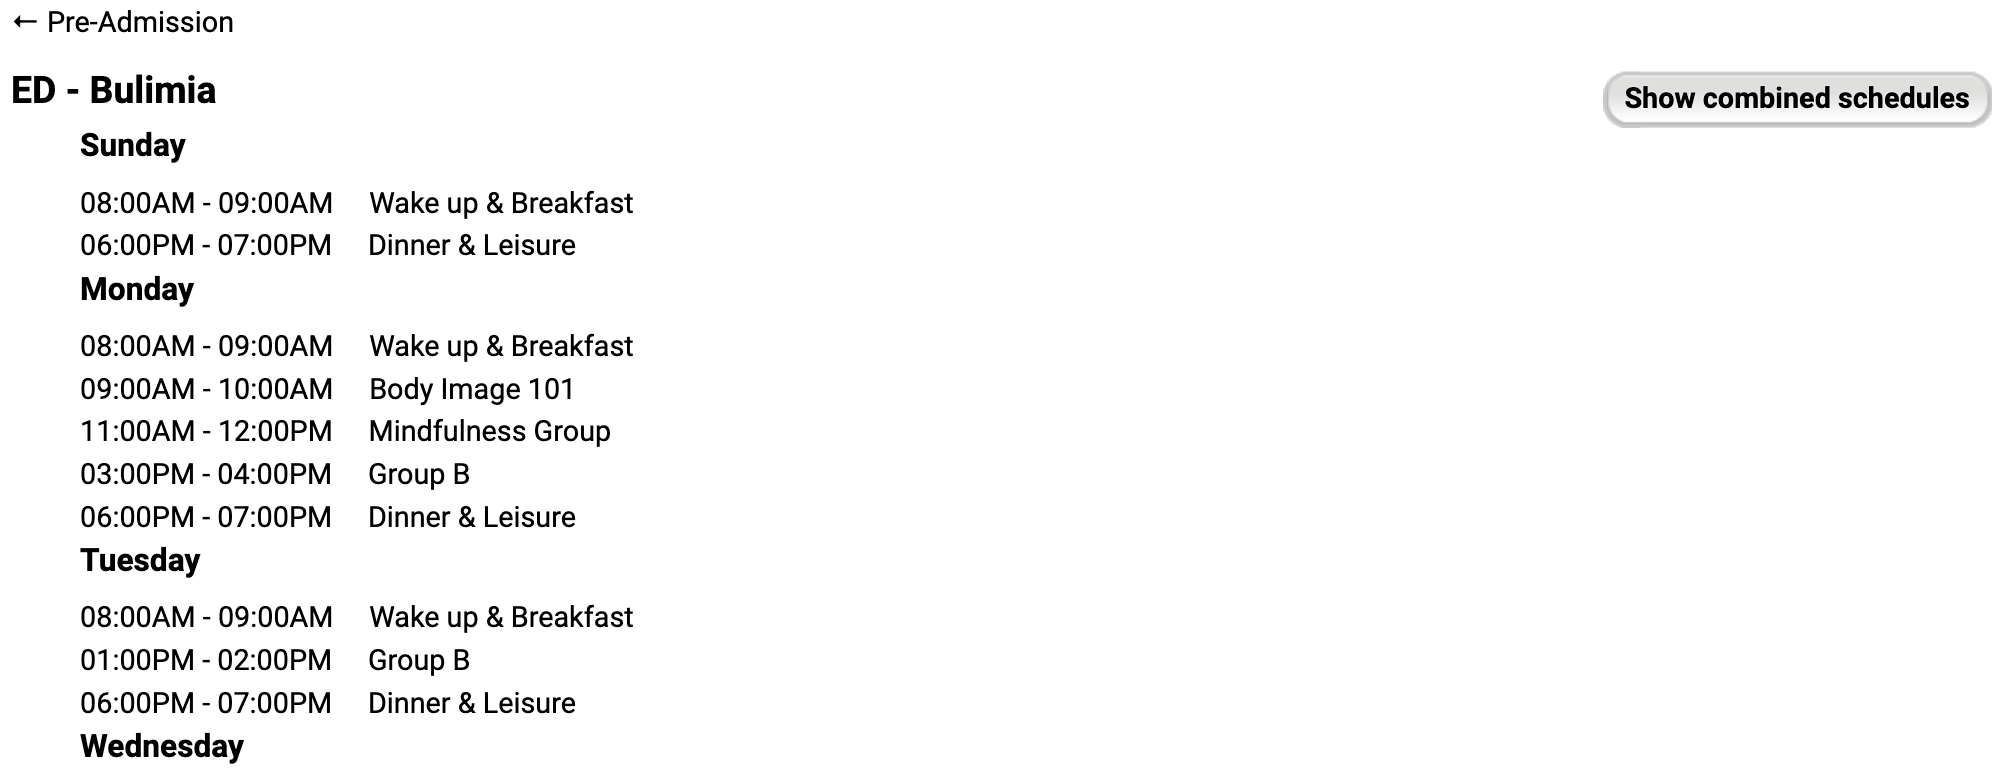
- Click on the Schedule name to view the associated Group Session day and time.
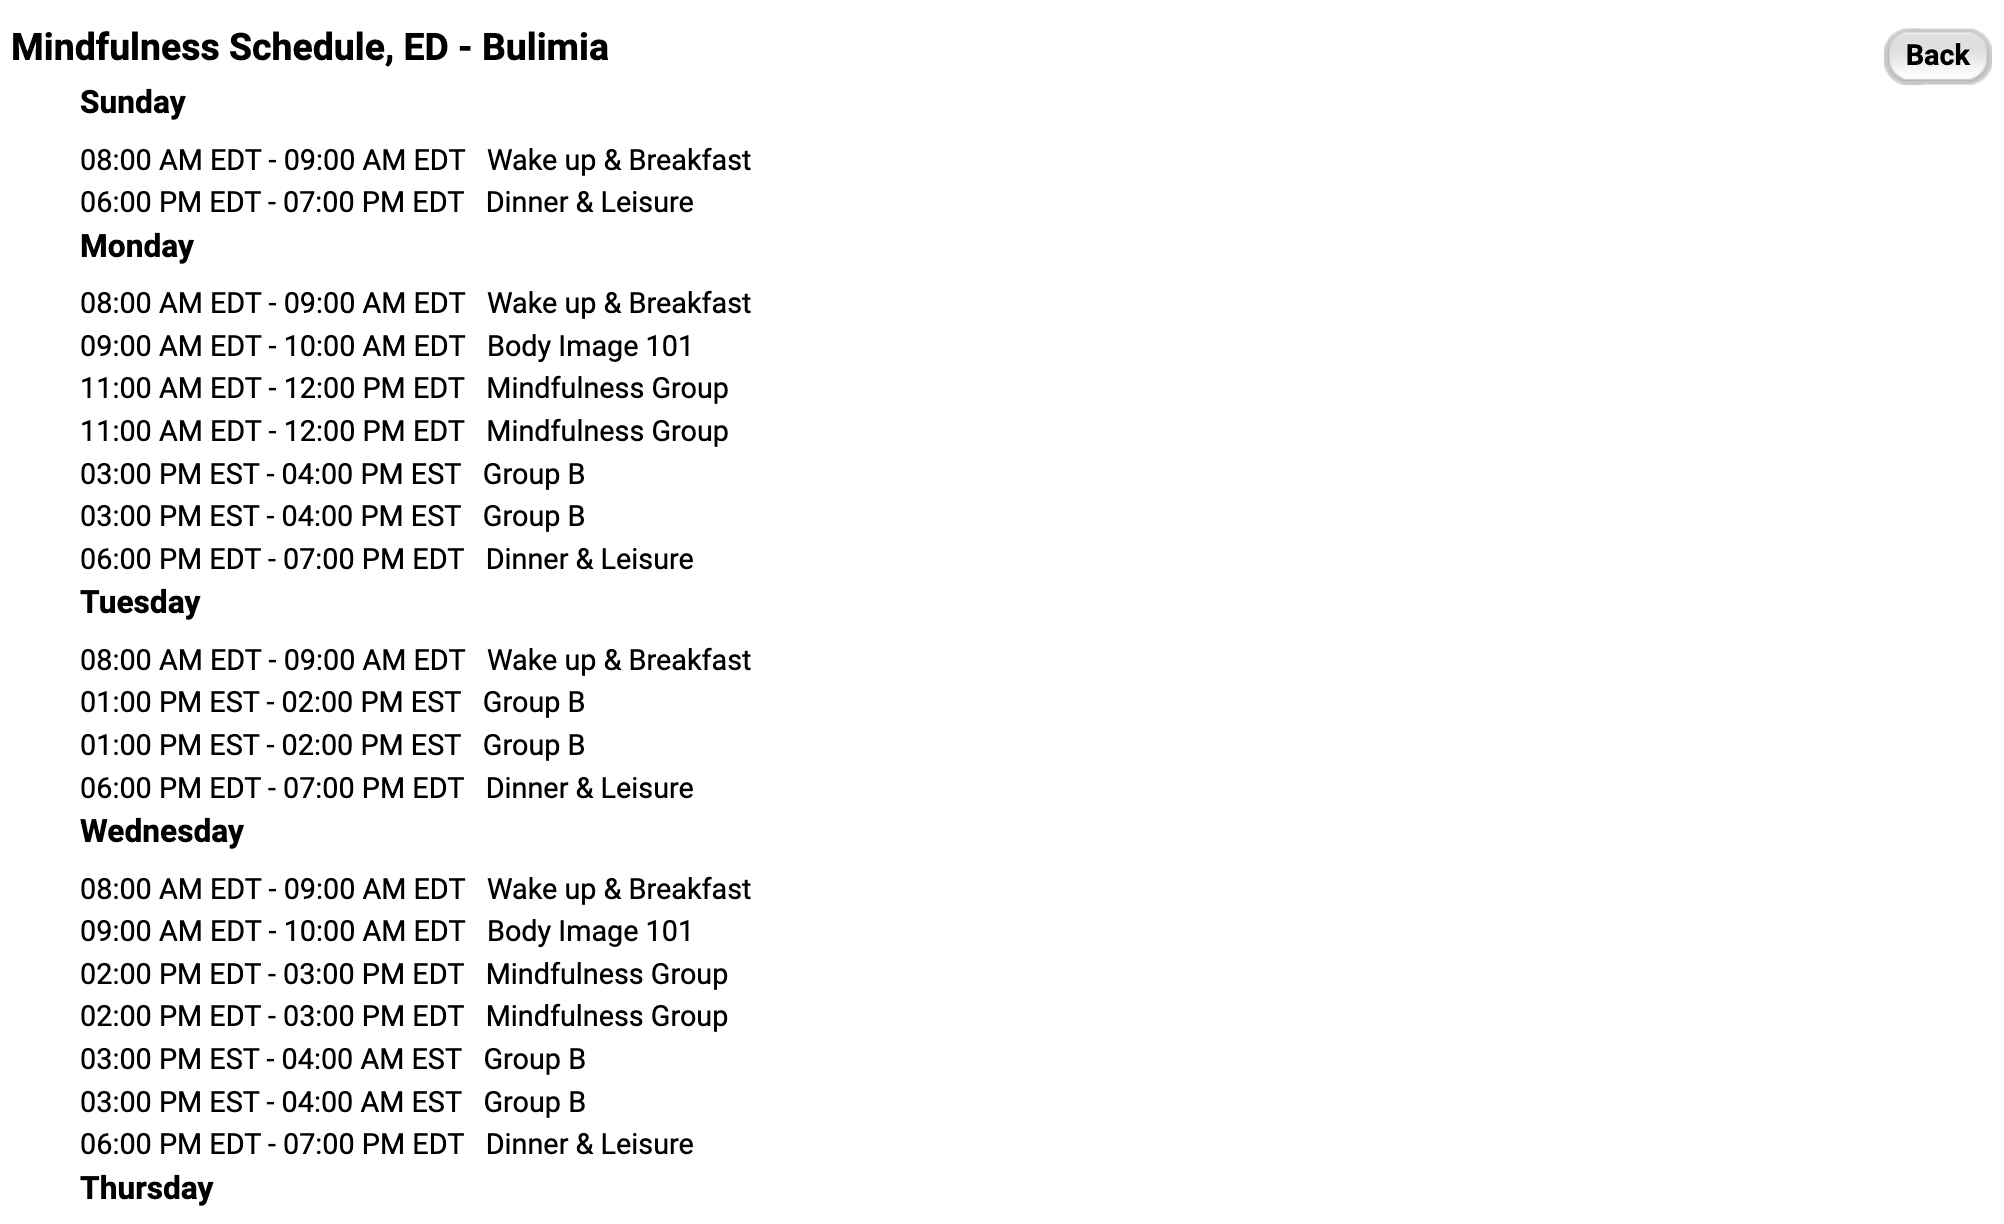
- If the patient has multiple schedules added to their profile, use the Show Combined Schedules button to view all group sessions assigned to the patient across their schedules.
- Click the Print icon to print out a paper copy of the schedule for the patient.

Dropping an Assigned Schedule
When a schedule no longer applies to the patient, you can drop the schedule.
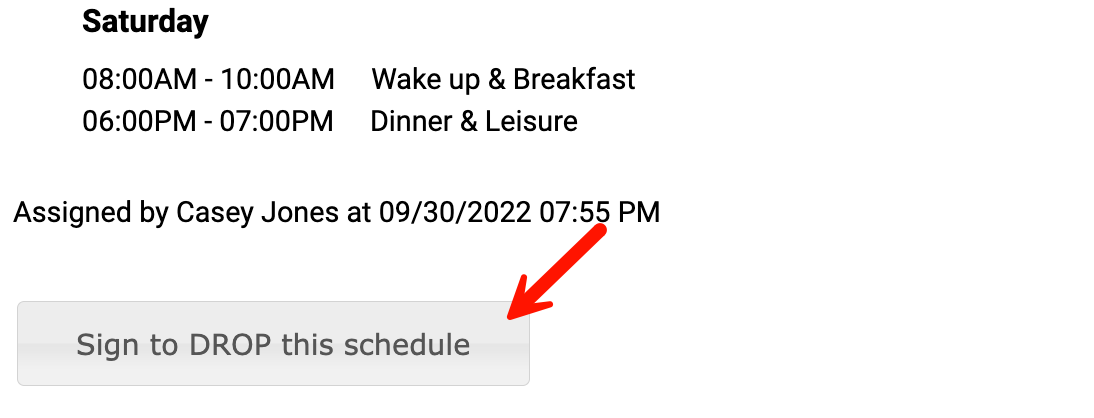
- From the patient chart, open the tab containing the Schedule.
- Click on the Schedule Name to open.
- At the end of the schedule, click Sign to Drop this Schedule.
- Sign and click Submit.
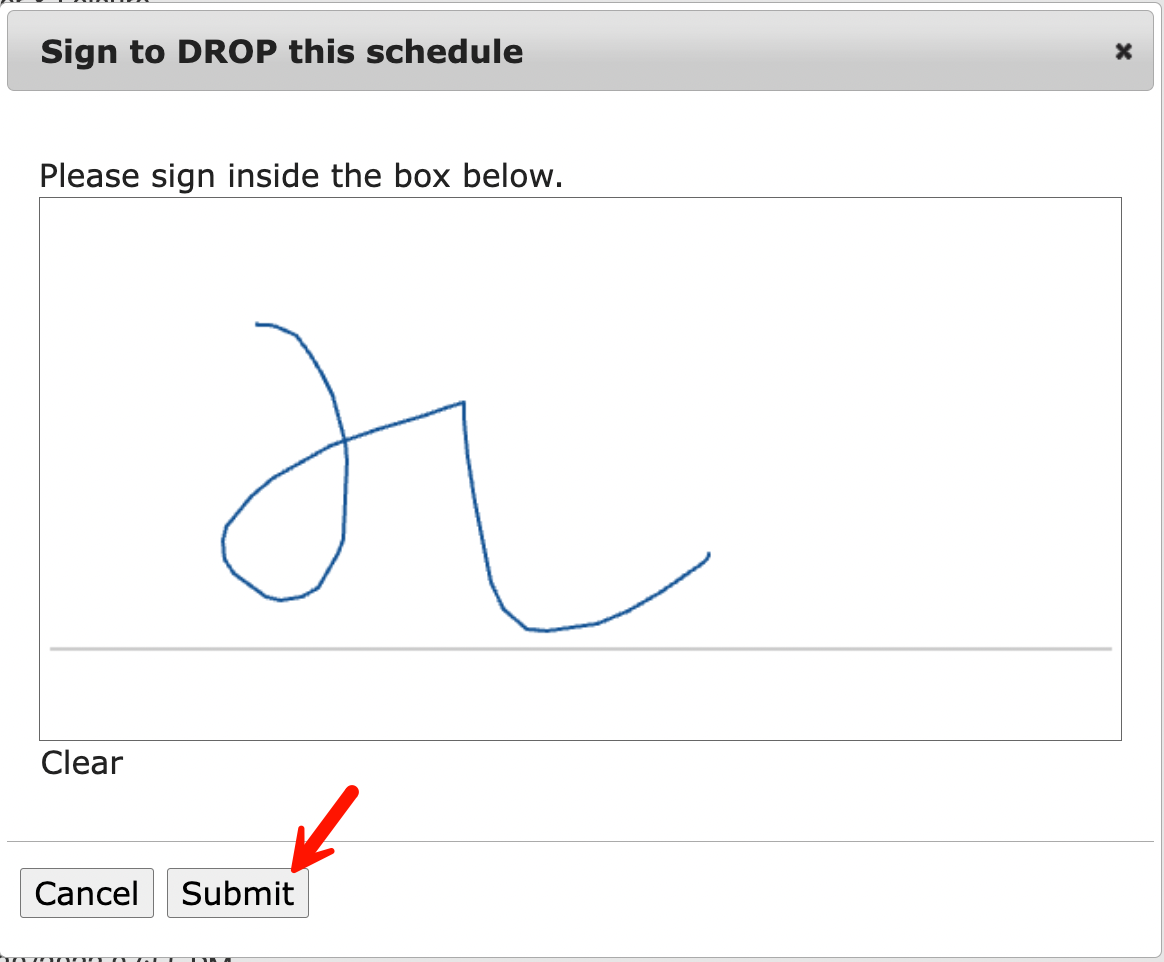
- The schedule will show as dropped.

Comments
0 comments
Article is closed for comments.