Sometimes a result received from the lab won't be assigned to the patient automatically. This tends to happen with the results-only interfaces because orders are sent to the lab on paper or a separate (non-Kipu) interface. In these scenarios, the lab may have to manually insert this information to process the specimen on their machine, increasing the chances of a data entry error. Use the following instructions to link unassigned lab reports to their proper patients.
- To begin, click on Labs > Lab Reports.
- Important
If you are in a master instance, you must begin by clicking My Locations in the header before you can see unassigned results. If you are in a single instance, you won't need to worry about this step.
- Important
- In the Lab Reports tab choose unassigned in the Select Status field and then click Search.
- To match an unassigned result, click on the Specimen ID which opens the Assign Lab Report to Patient window.
- In the Assign Lab Report to Patient window, you'll see the Specimen ID, Accession No, Patient Name, Date of Birth, Gender, and Collection Date as reported by the lab.
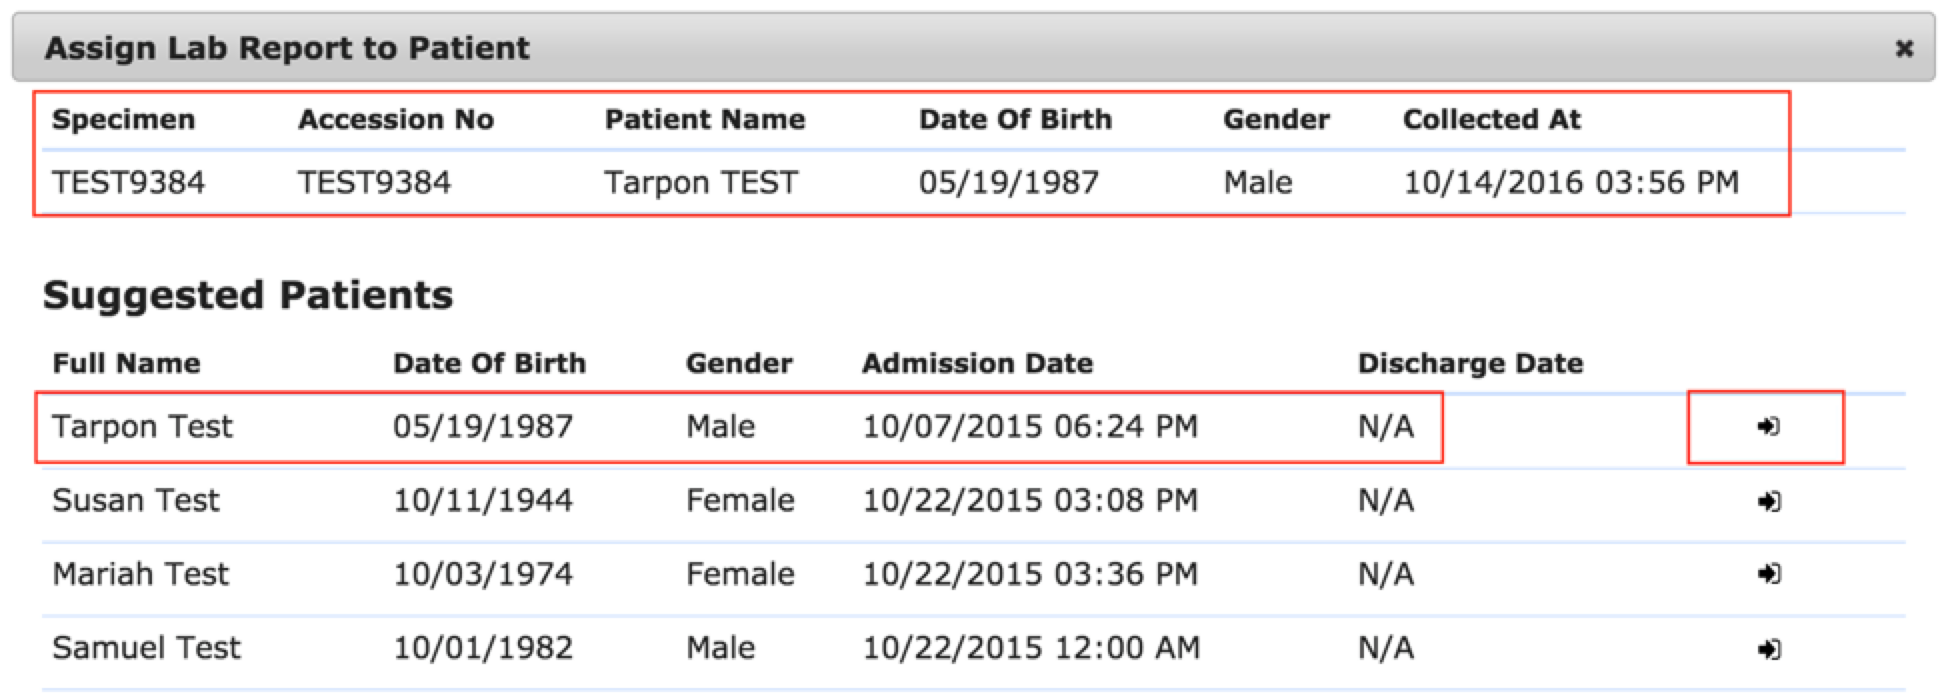
- Using this information, Kipu suggests a list of patients to whom the result may belong.
- If the patient that matches the information at the top is listed in the Suggested Patients list, simply click Assign to the right of that patient.
- If the patient is not listed, use the Select Manually search bar to search your admitted and discharged patients list.

- When you locate the patient, click Assign.
Comments
0 comments
Article is closed for comments.