You can display your current occupancy as a Bed Board on as many displays (monitors) as needed throughout your premises or authorized locations.
Kipu clients often display Bed Boards in Common in call center areas, the nurses' station, executive offices, etc.
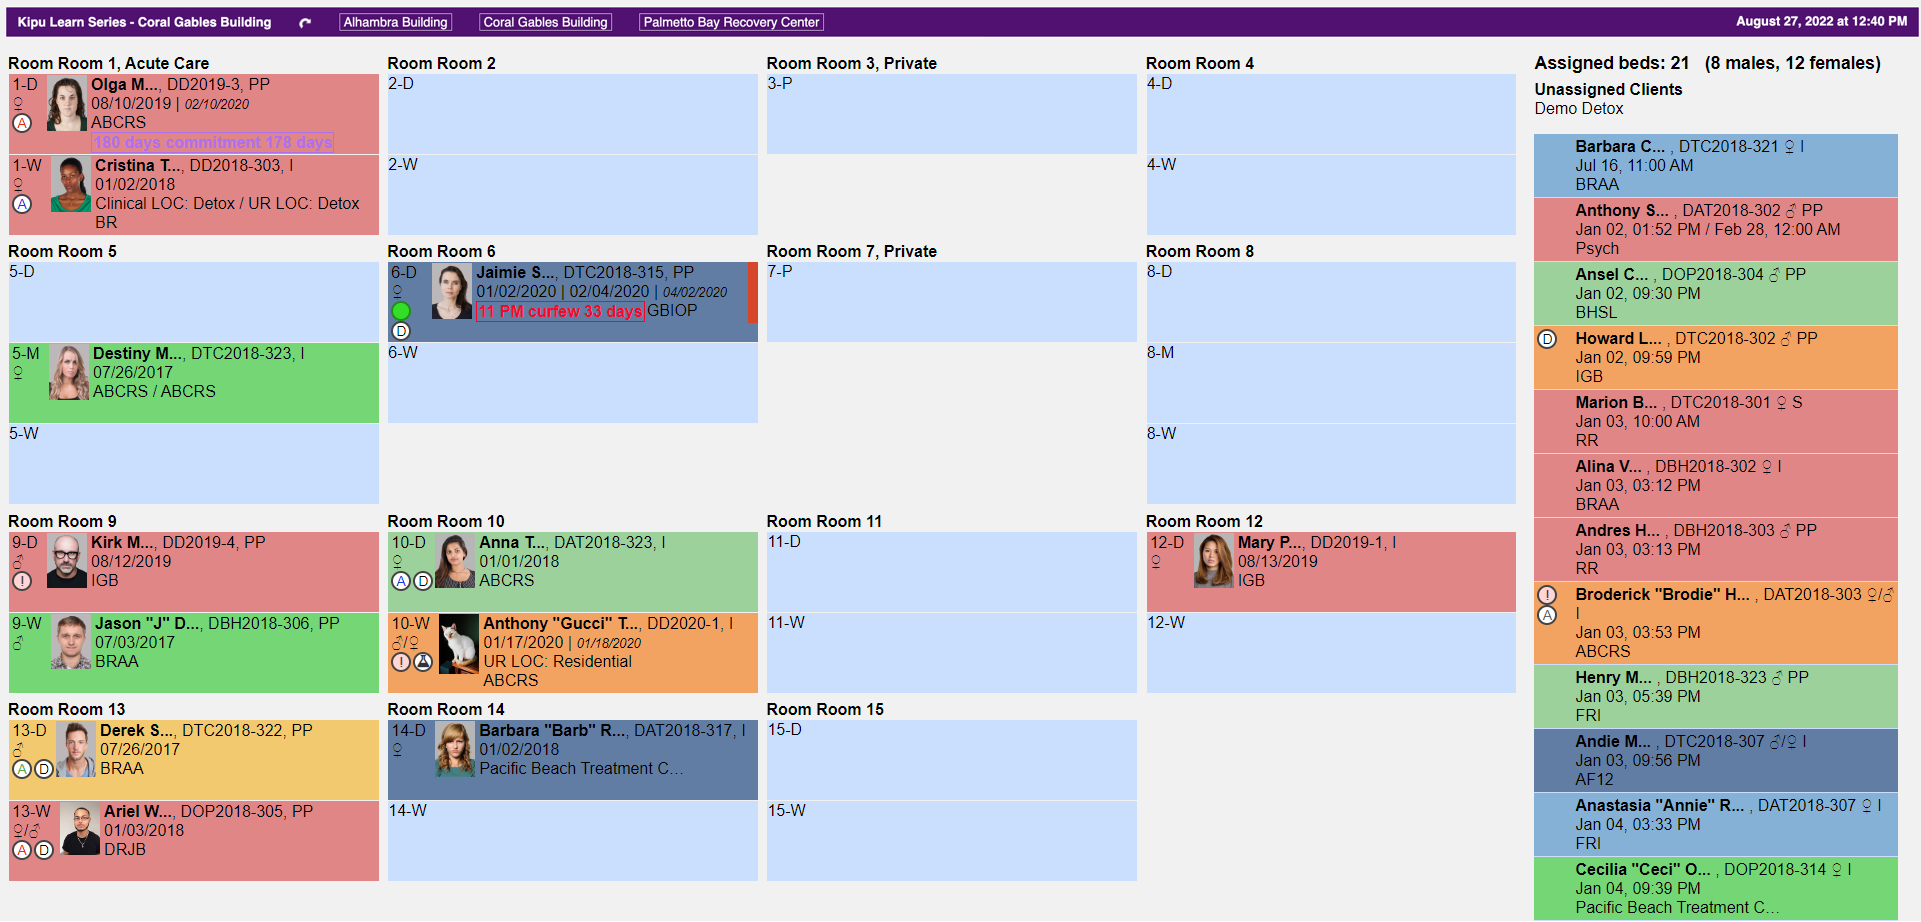
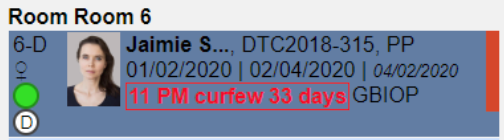
The Bed Board Display shows patients in your current census for a specific building grouped by the assigned room.
Each patient's tile includes the following information: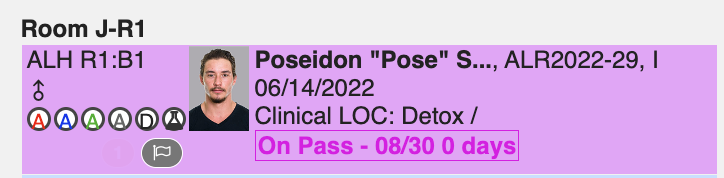
- Bed name, gender/gender identity icon, patient badges (urgent issues, allergies, diets, etc...), and flags.
- Patient picture
- First name, "preferred name", last initial, MR Number, and payment method abbreviation
- Admission date, discharge date, anticipated discharge date (if available)
- Clinical Level of Care / UR Level of Care
- Shortcode(s) for referral/discharge to
- Statuses added to the patient chart.
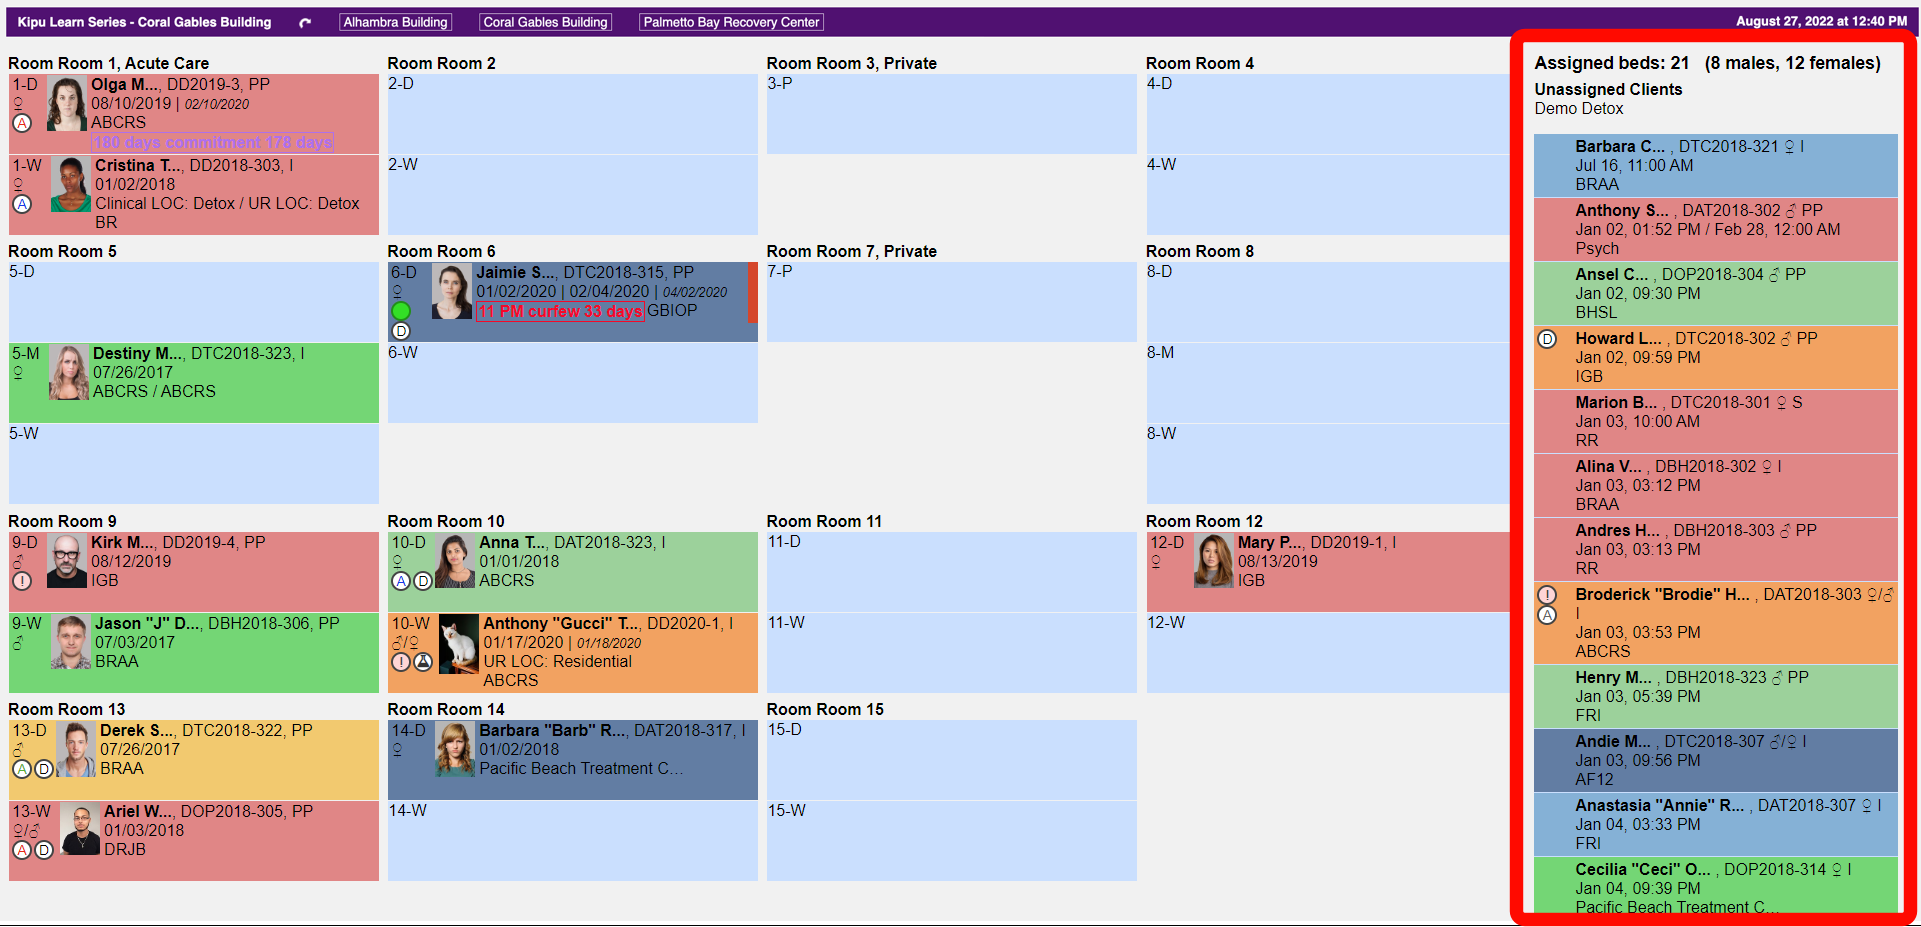
The right side of the screen shows the number of assigned beds and the list of unassigned patients in the location.
Use the rotate icon to display occupancy vertically or horizontally.
![]()
Bed Board Display refreshes every 2 minutes to acquire the latest information. You can view the last time the board refreshed in the top right corner.

A plain blue background indicates that the bed is available.
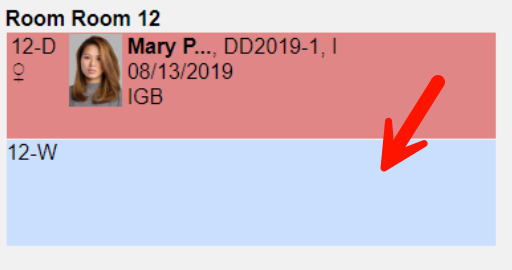
A red line next to the patient tile indicates there is another patient assigned to this bed for a later time (typically when the patient is being discharged today and a new patient is being admitted after that time).
How to Set Up Bed Board Display
Bed Board Displays are created using a special user profile. Super Admins or users with the Manage Users feature can create this user following the steps below.
Create Display User(s)
Depending on how many locations and buildings you have, and how you'd like to display each building, you may need to create more than one display user.
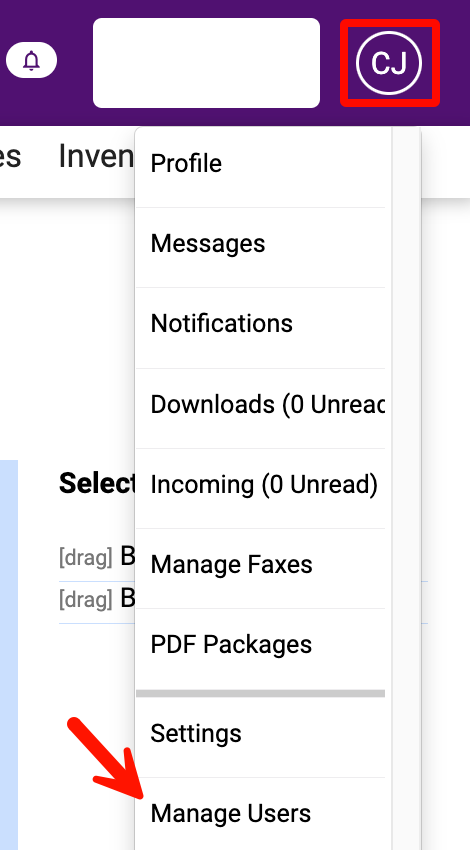
- Click on your initials and select Manage Users.
- Click New User.

- Enter the user's First name and Last name.

- Add an Email address. This email must be valid, as the instructions for account creation will be sent to this email and those instructions are the only way to set up a password to access the account.

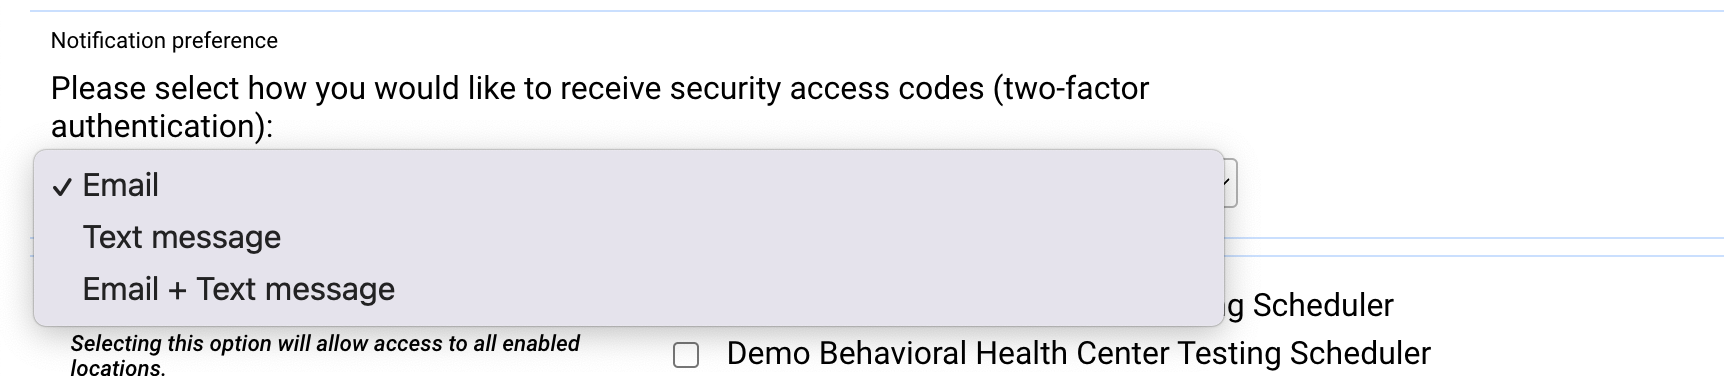
- Two-factor authentication: If enabled in your instance, select the preferred method of receiving a code. Note: if you select Text or Text + Email, a user profile has to have a mobile phone number entered.
- Locations: We recommend selecting one Location only for users with a master instance. This field is required for those with a master instance, it is not required for a single instance.
- Roles - Internal: Do not enable any of the internal roles.
- Roles - External: Check Display.
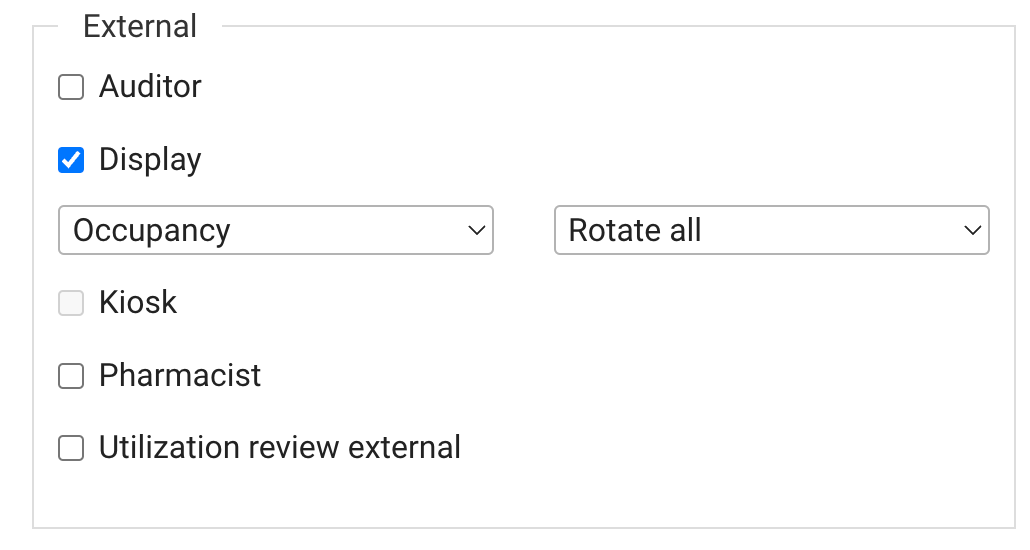
- Select Occupancy from the drop-down.
- Use the Rotate all drop-down to select a specific Building for your screen. Or leave as Rotate all to switch the occupancy details for all buildings every 2 minutes. If you need to show occupancy from different buildings on different screens, you will need to create a Display user for each screen.
- Restricted Patients: You can use this section to restrict the visibility of any patient charts added. All personal details will be hidden, the bed will be shown as occupied, and the MR # is available, but no name or picture shown.
- Don't use Restrict all except for caseload. Display users cannot have a caseload.
- Click Register & Invite.
- Check the included email for account activation instructions from support@kipusystems.com.
Display Bed Board
To display the bed board, sign in with the Display user you've created on the device that is controlling the display screen(s).
Comments
0 comments
Article is closed for comments.