When a prospective patient arrives at the facility, staff members prioritize creating a comfortable and welcoming environment, focusing on the patient’s physical and emotional state. Following recommended workflows ensures accurate and efficient patient information capture and timely processing, providing a seamless intake experience.
Note: This process only describes the admissions process for clients not using a CRM or integrated RCM platform.
Best Practice Workflow Video
Workflow 1: Outpatient Facility (In-Person)
Let's review the workflow for welcoming a patient to an outpatient facility.
Option One: Check the Patient in Using Scheduler
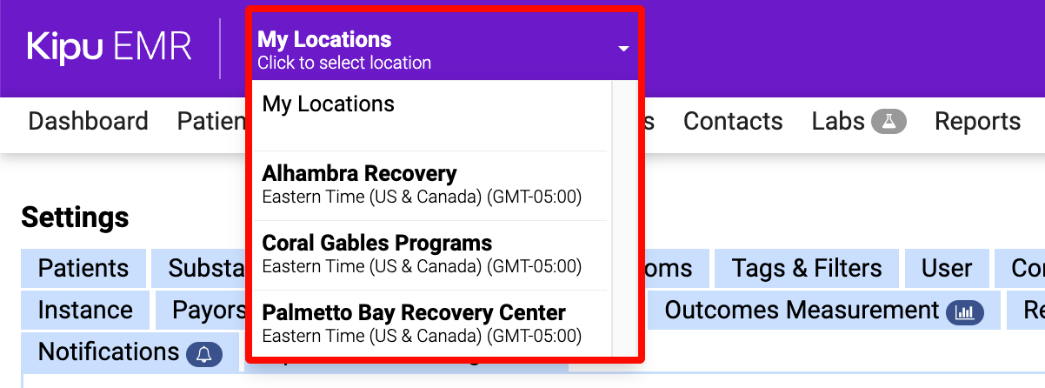
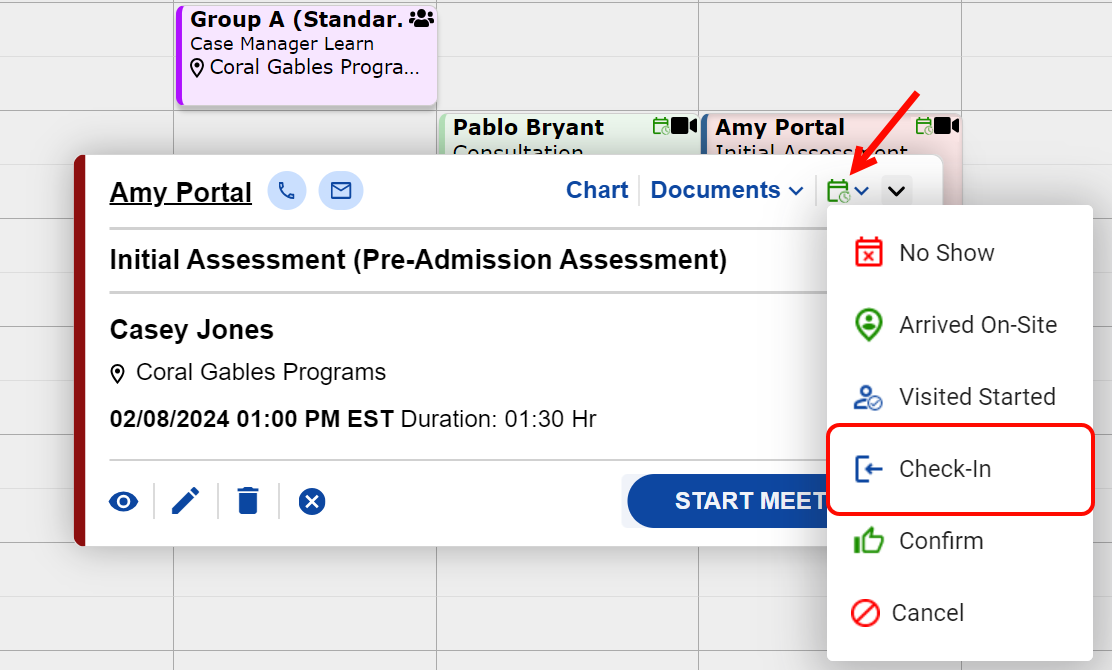
- To begin, select a location.
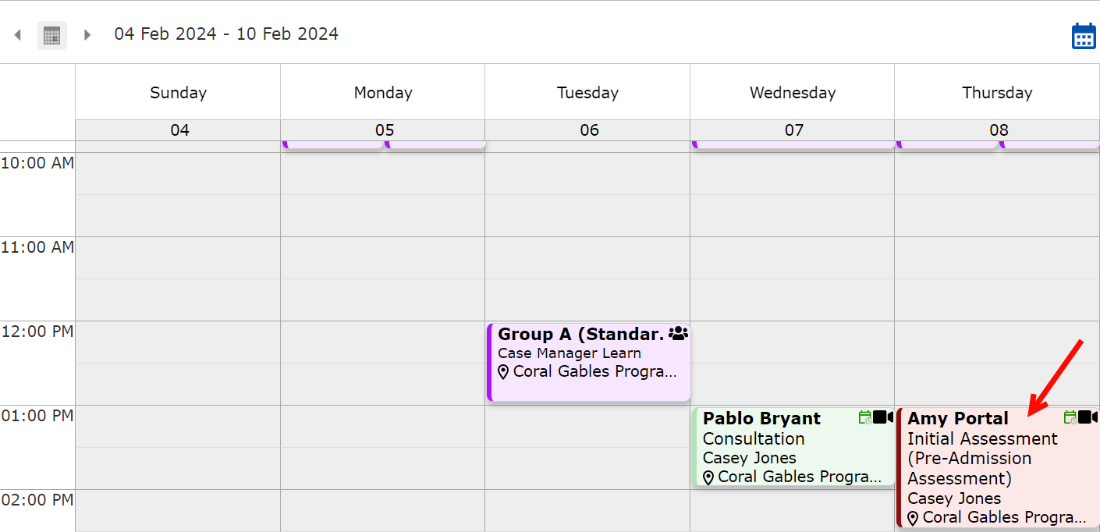
- Click on the Schedules tab and then on Scheduler.
- Click on the desired appointment tile in the Scheduler calendar.
- For an in-person appointment, check the patient in by clicking on the Status drop-down menu and selecting Check-In. For more information on adding appointments to the Scheduler, click here.
- Checking in the patient through Scheduler does not automatically check them into the queue. Let's review how to check the patient into the appropriate queue.
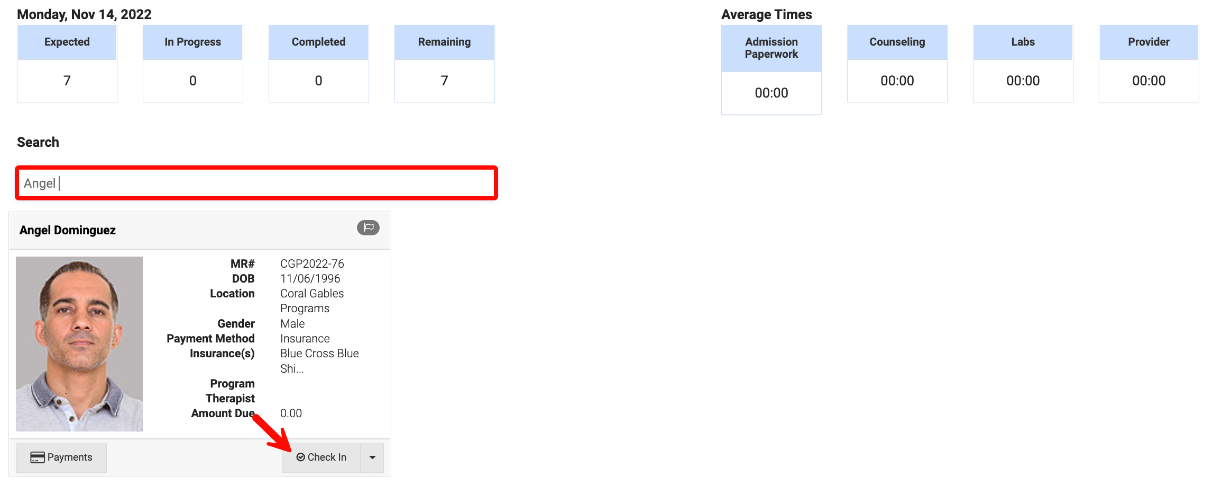
-
Click on the Queues tab.
-
Use the search bar to locate the patient by MR number, first name, or last name, and click the Check-in button. Click here to learn more about patient queues.
- Once the patient is checked in, the intake process begins.


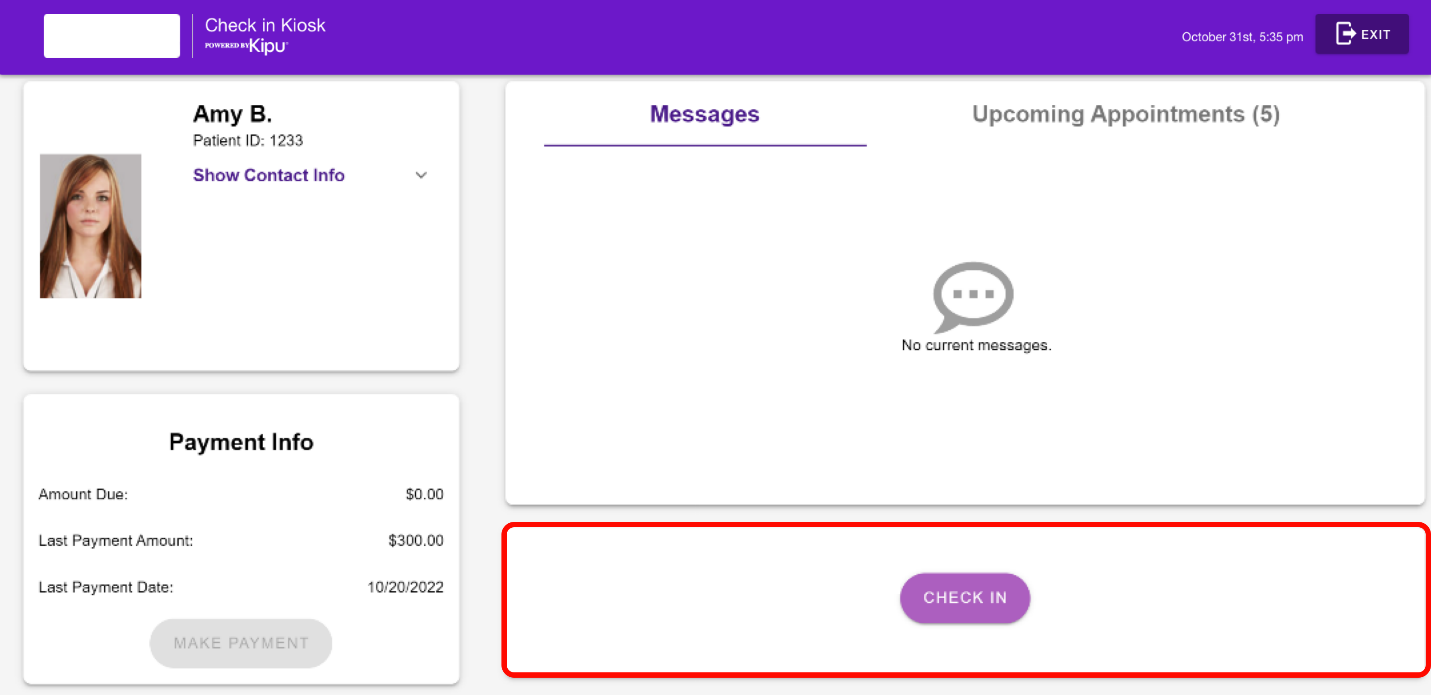
Option Two: Self-Check in via Kiosk
Let's review the workflow commonly used by outpatient facilities where patients check themselves in using a kiosk.
Best Practice Workflow Video
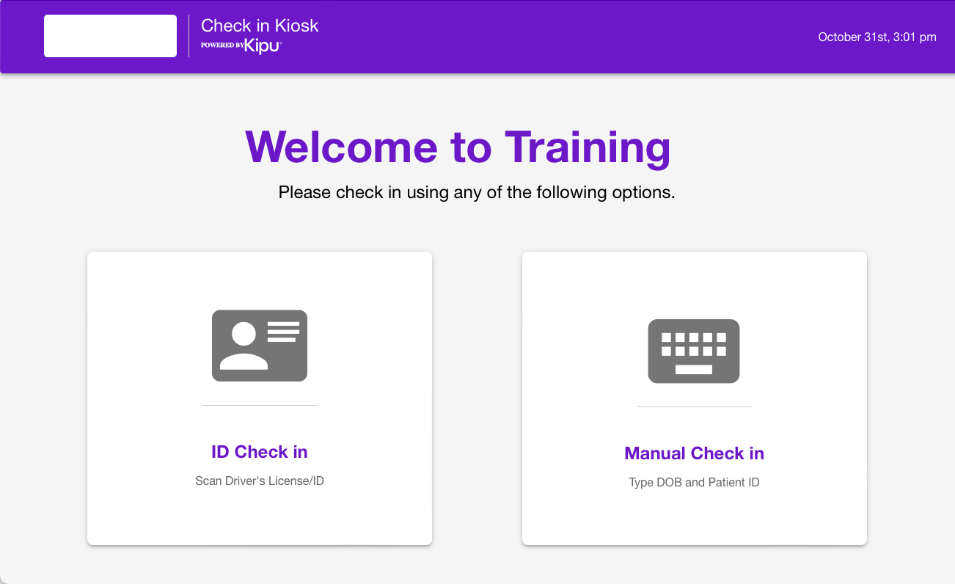
Self-Check in via Kiosk
-
Patients can check themselves in by clicking ID Check In and scanning their driver’s license or State ID, or by clicking Manual Check In and entering their date of birth and patient ID
- Once checked in at the kiosk, the patient is automatically added to the queue. For more information about the kiosk check-in process, click here.
- Once the patient is checked in and added to the queue, they must be checked in to Scheduler. To check them in, click on the Schedules tab and then on Scheduler.
- Then click on the patient’s appointment tile on the calendar.
- Finally, choose Check-In from the status drop-down. For more information on the Scheduler, click here.
- Once the patient is checked in, the intake process begins.


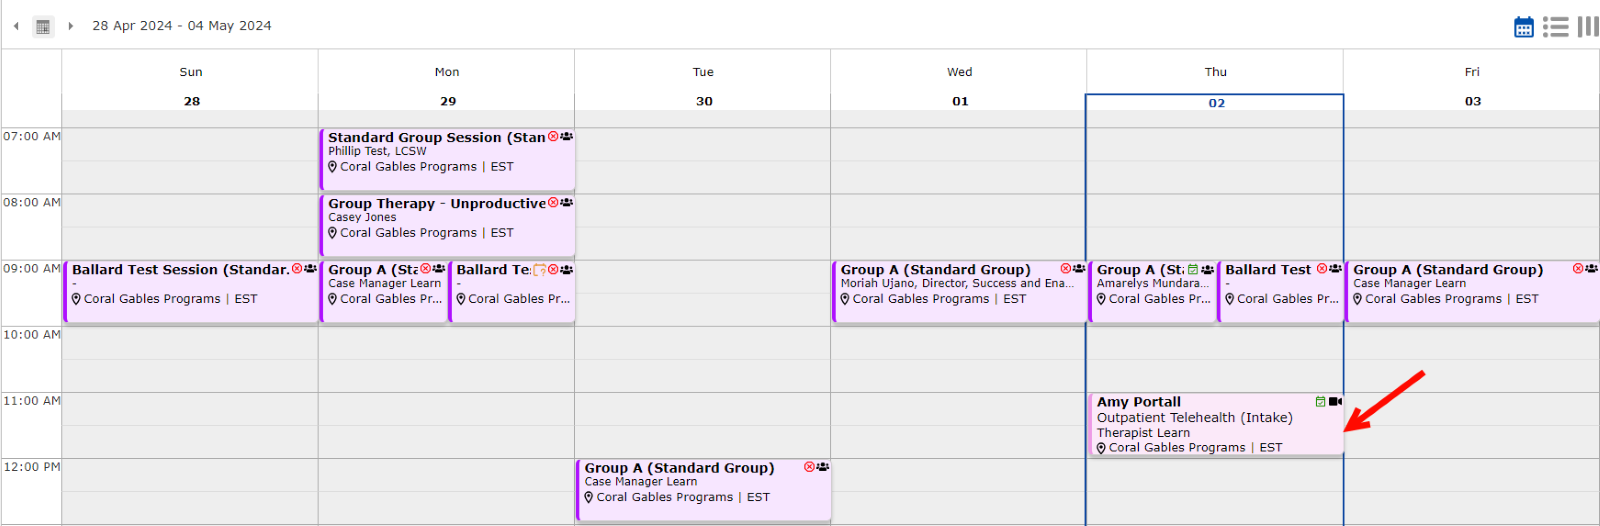
Workflow 2: Outpatient Facility (Telehealth)
Let's review how to begin the telehealth visit for an intake appointment.
- Click the Schedules tab and then Scheduler.
- Click on the desired patient’s appointment tile on the calendar.
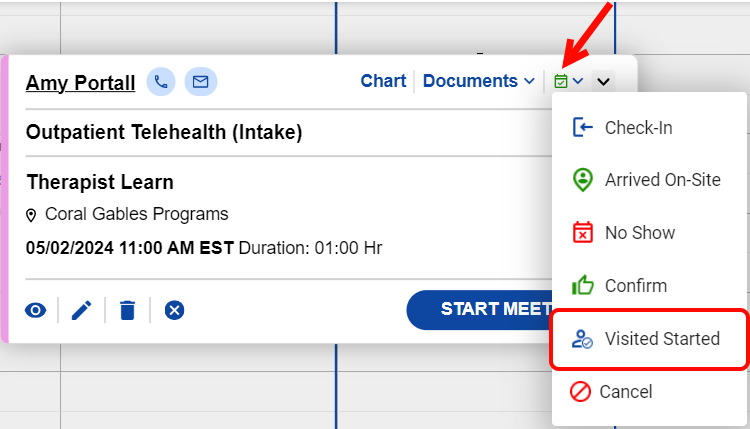
- Click Start Meeting to launch the telehealth appointment.
- Click on the Status drop-down menu and select In Progress. Because status names are customizable, you may have this status named something else like Visited Started. For more information on adding appointments to the Scheduler, click here.


Workflow 3: Inpatient Facility (Intake Appointment)
Let's review the workflow for beginning an intake appointment for an inpatient facility.
-
Click on the Schedules tab and then Scheduler.
-
Click on the desired appointment tile on the calendar.
-
Check the patient in by clicking on the Status drop-down menu and selecting Check-In. For more information on adding appointments to the Scheduler, click here.


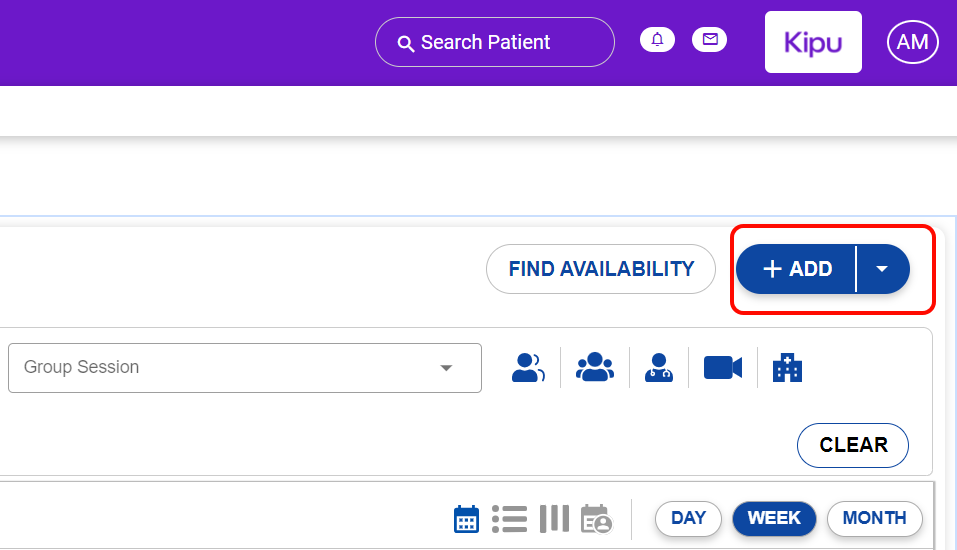
Workflow 4: Walk-In Patient (No Intake Appointment)
If your facility accepts walk-ins, let's review the workflow for setting up an intake visit for an unscheduled patient.
-
Click on the Schedules tab and then Scheduler.
-
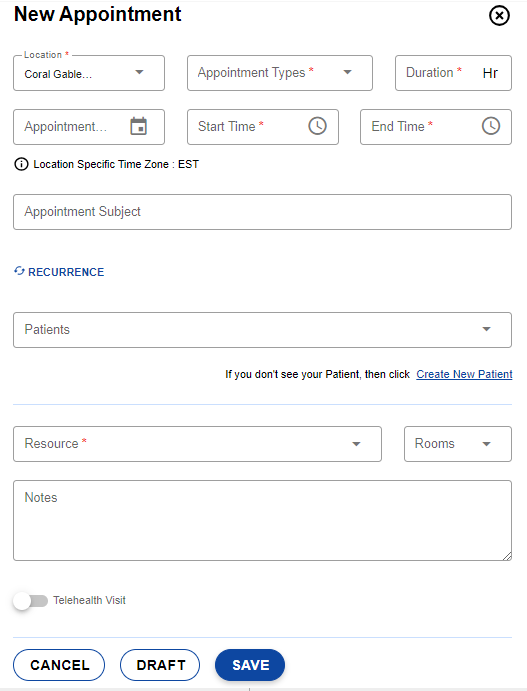
Click + Add.
-
In the New Appointment window, enter the patient's first name and last name to search for any previously created matching patient records. For detailed instructions on adding appointments to the Scheduler, click here.
- If you do not see the patient, click the Create New Patient link. Follow our best practice recommendations for collecting patient information and verifying insurance benefits, click here for instructions.
- If a previous episode of care matches the patient’s information, choose to readmit the patient to reduce collecting demographic data points.
-
After creating the new patient chart or re-admitting the client with a new chart, complete the fields required to schedule the appointment and click Save.
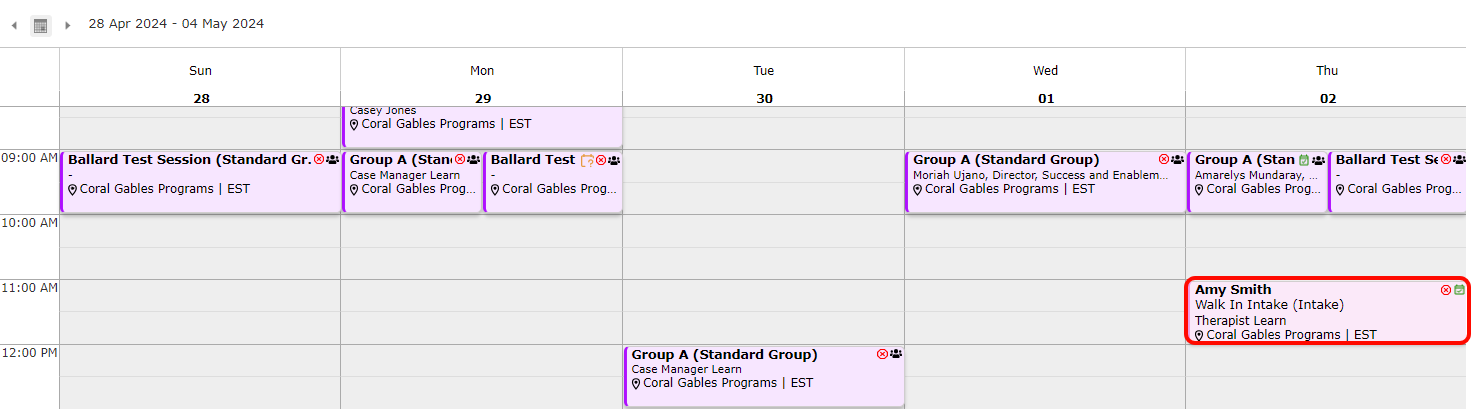
- The appointment has been scheduled and will be displayed on the Scheduler.
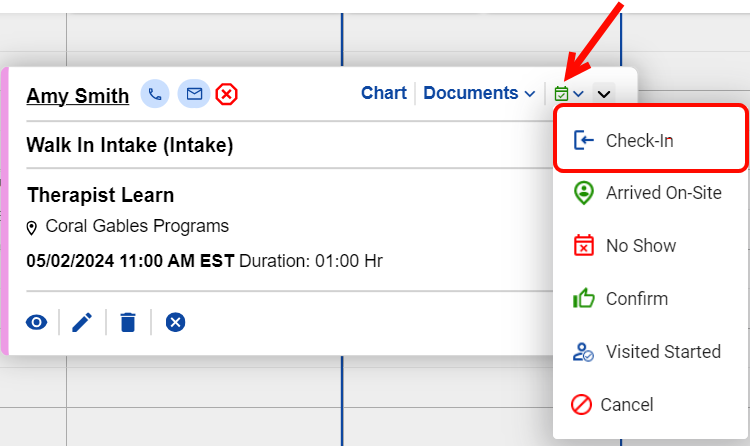
- Check the patient in by clicking on the Status drop-down menu and choosing Check-In.

Comments
0 comments
Please sign in to leave a comment.