The Information tab of the patient chart, often called the Facesheet, serves as a crucial foundation for the medical chart and helps the facility provide safe and effective care. Frequently the information in this section is collected during the pre-admission process, however, during the admission process, the user will focus on filling in any missing information gaps in the Kipu EMR.
Note: This process only describes the admissions process for clients not using a CRM or integrated RCM platform.
Best Practice Workflow Video
Workflow Steps
Let’s review Kipu’s best practices for completing missing information on the facesheet during admission.
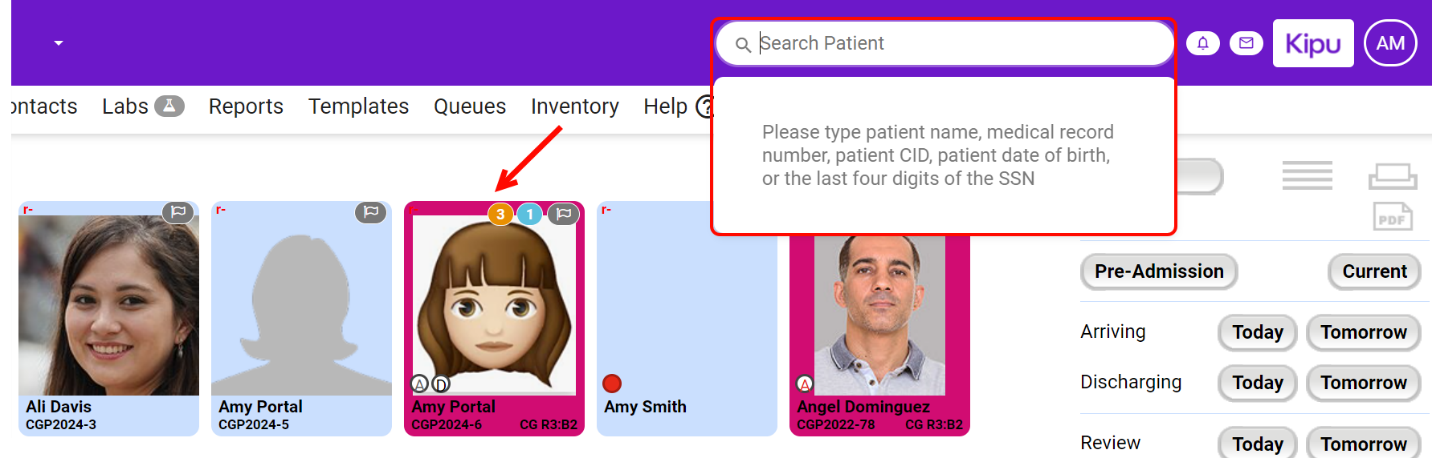
- Search for the patient from the top search bar or click on the desired patient in the landing page. Click here to learn more about patient quick search.
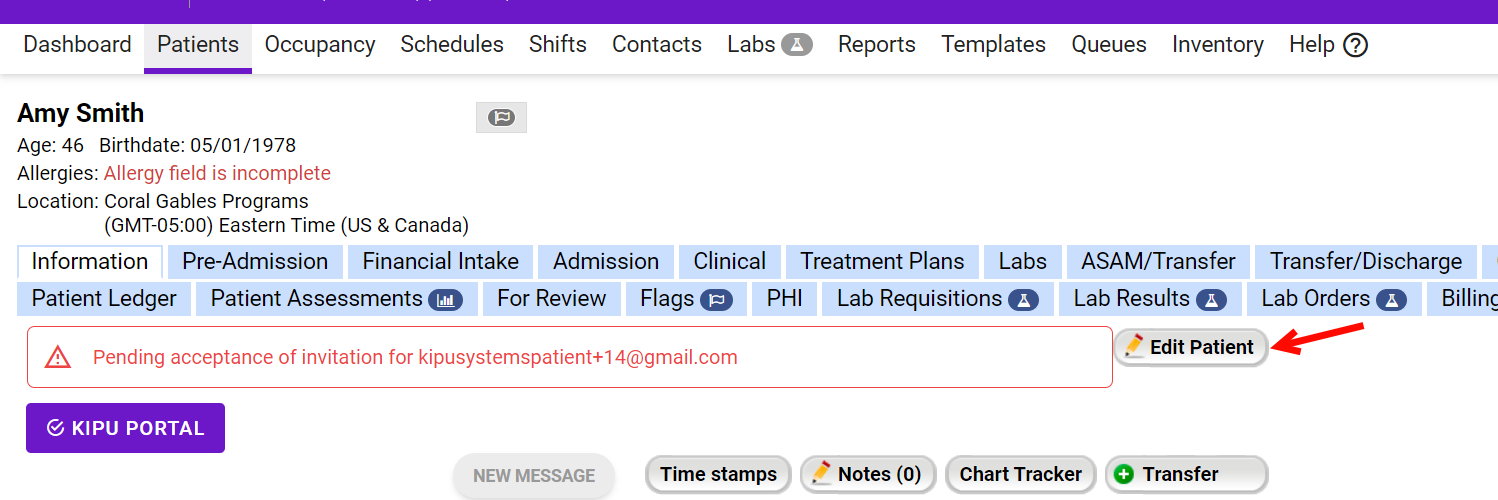
- Click on the Edit Patient button in the patient chart.
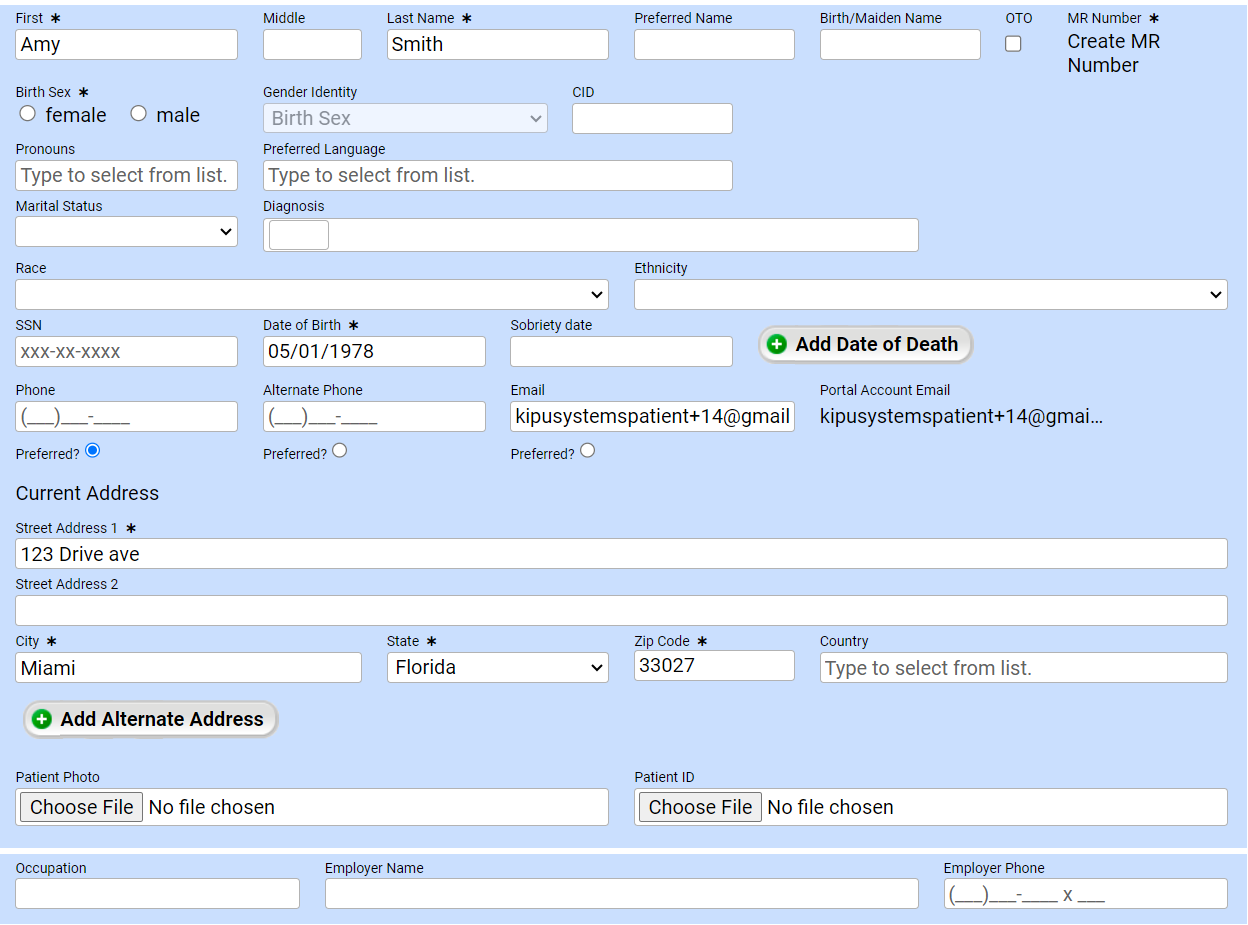
- Fill out the required fields indicated with asterisks (*). We recommend filling out as much of the facesheet as possible. Click here to learn more about adding a patient to the Kipu EMR.
- Assign any necessary statutes or tags. Click here to learn more about patient tags and custom filters.
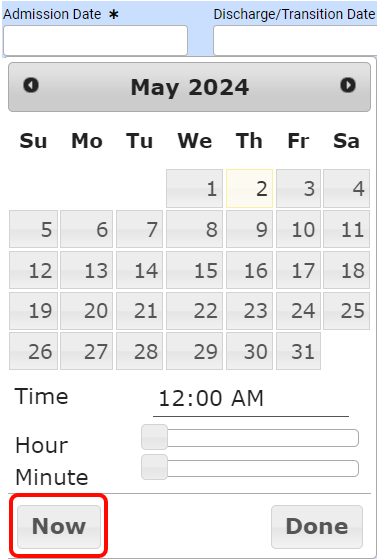
- Type in the admission date or click on the Admission Date field and select the desired date from the calendar pop-up. Use the sliders to set the time of admission. Click Now to enter the current date and time in this field.
- Complete any missing demographic information.
- Click Create MR Number to generate the patient’s MR number. Assign an MR number upon the client's arrival at the facility on the admission date. For telehealth, assign the MR number upon admission to the facility.
- Collect the patient’s email address and phone number and be sure to invite the client to the Patient Portal. For more information about the Patient Portal, click here.
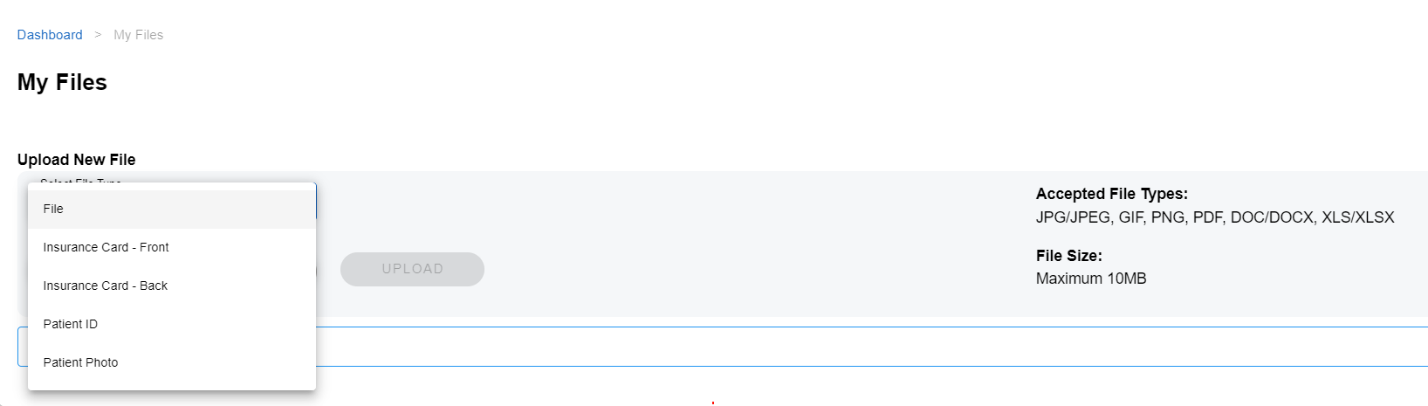
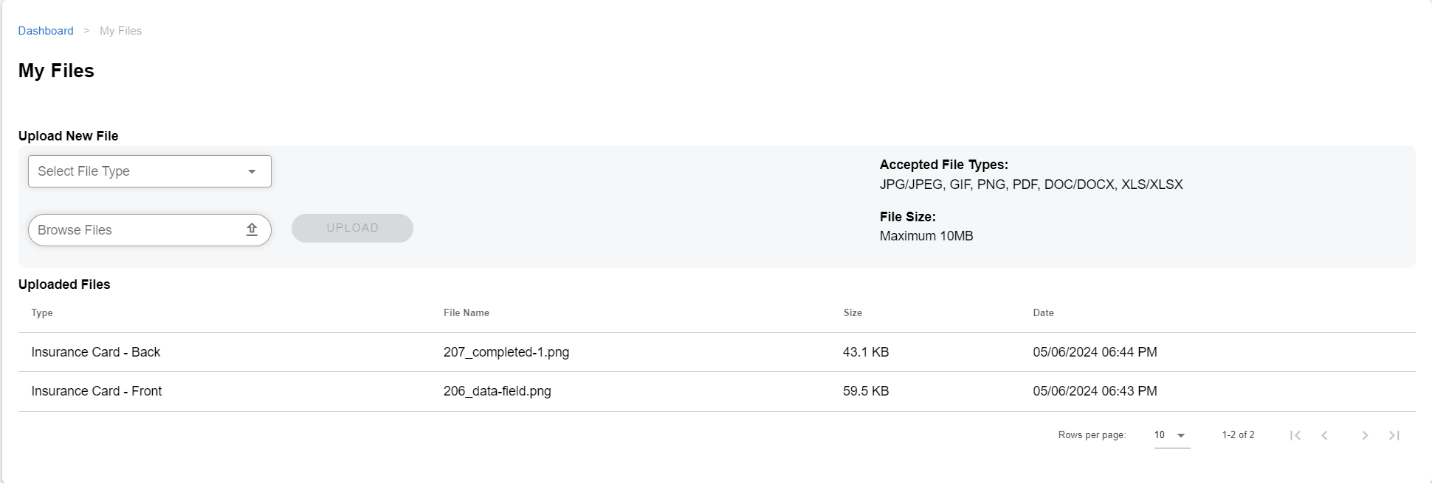
- Upload the patient photo and the patient ID. Click here to learn how to upload a photo.
- Note: If the patient is already registered to the Patient Portal, patients can upload the required documents in the Patient Portal. For more information about the Patient Portal, click here.
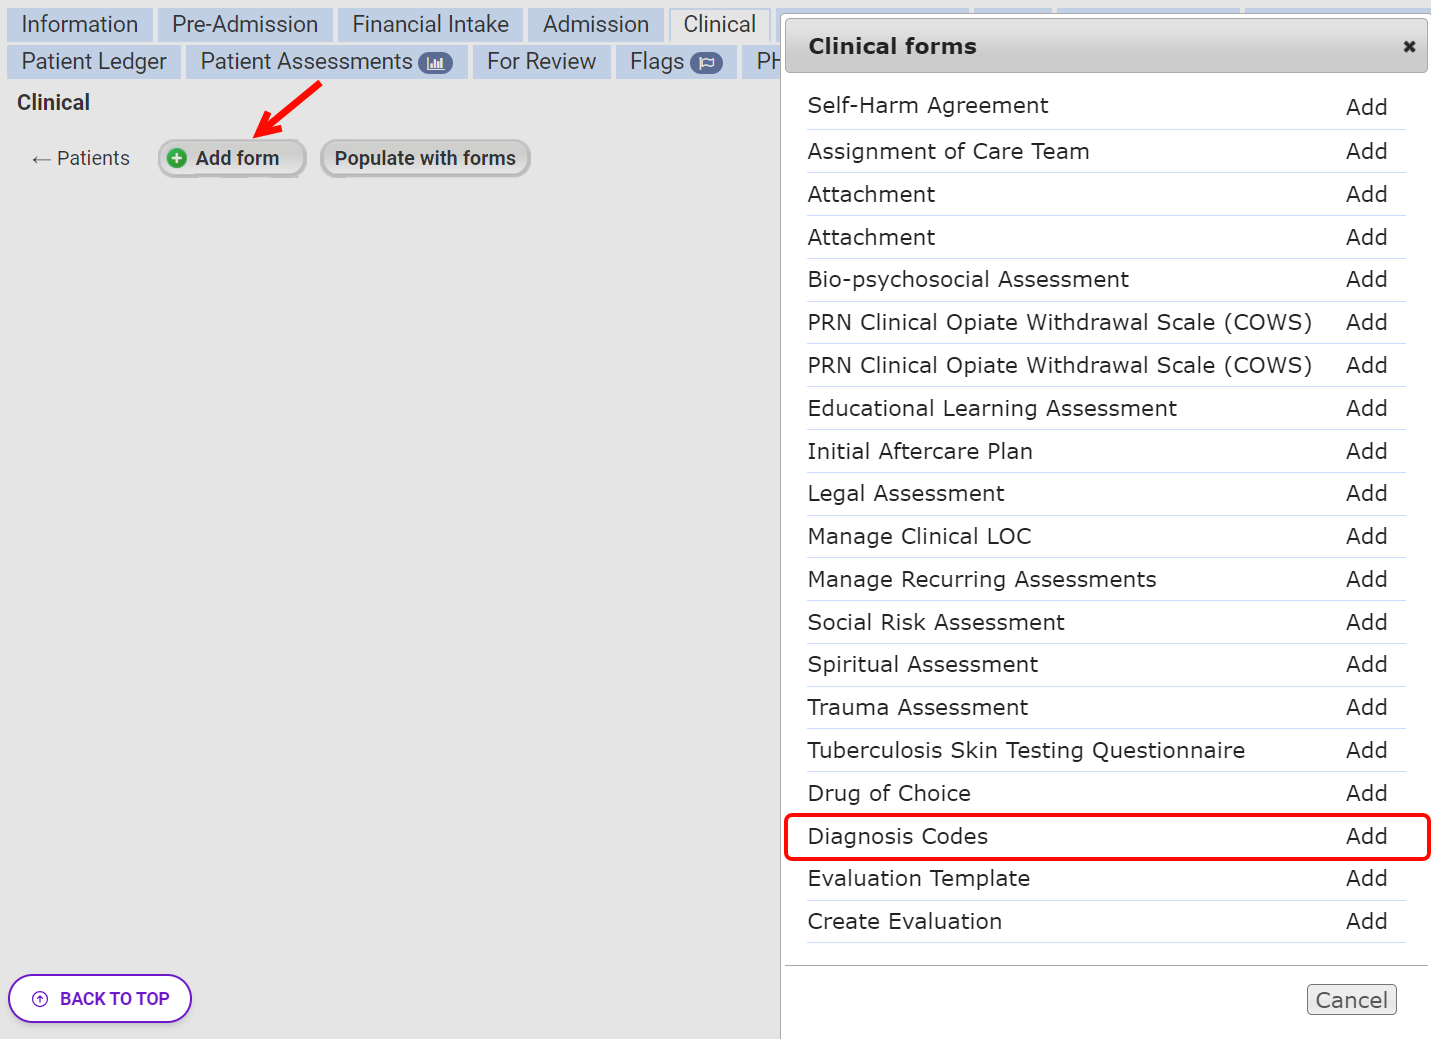
- Add an initial diagnosis code as an indicator for preliminary diagnosis codes. For more information on diagnosis codes, click here.
- If an initial diagnosis is needed to request a lab and a licensed clinician is not available at the time, enter the initial diagnosis code directly on the facesheet. A licensed clinician can confirm and submit additional diagnosis codes through the Manage Diagnosis Code” form in the patient’s chart.
- If an initial diagnosis is needed to send a lab requisition out and a licensed clinician is available, the diagnosis code can be entered by the licensed staff member by clicking on the Manage Diagnosis Code form, instead of the facesheet. For more information on diagnosis codes, click here.
- If an initial diagnosis is needed to request a lab and a licensed clinician is not available at the time, enter the initial diagnosis code directly on the facesheet. A licensed clinician can confirm and submit additional diagnosis codes through the Manage Diagnosis Code” form in the patient’s chart.
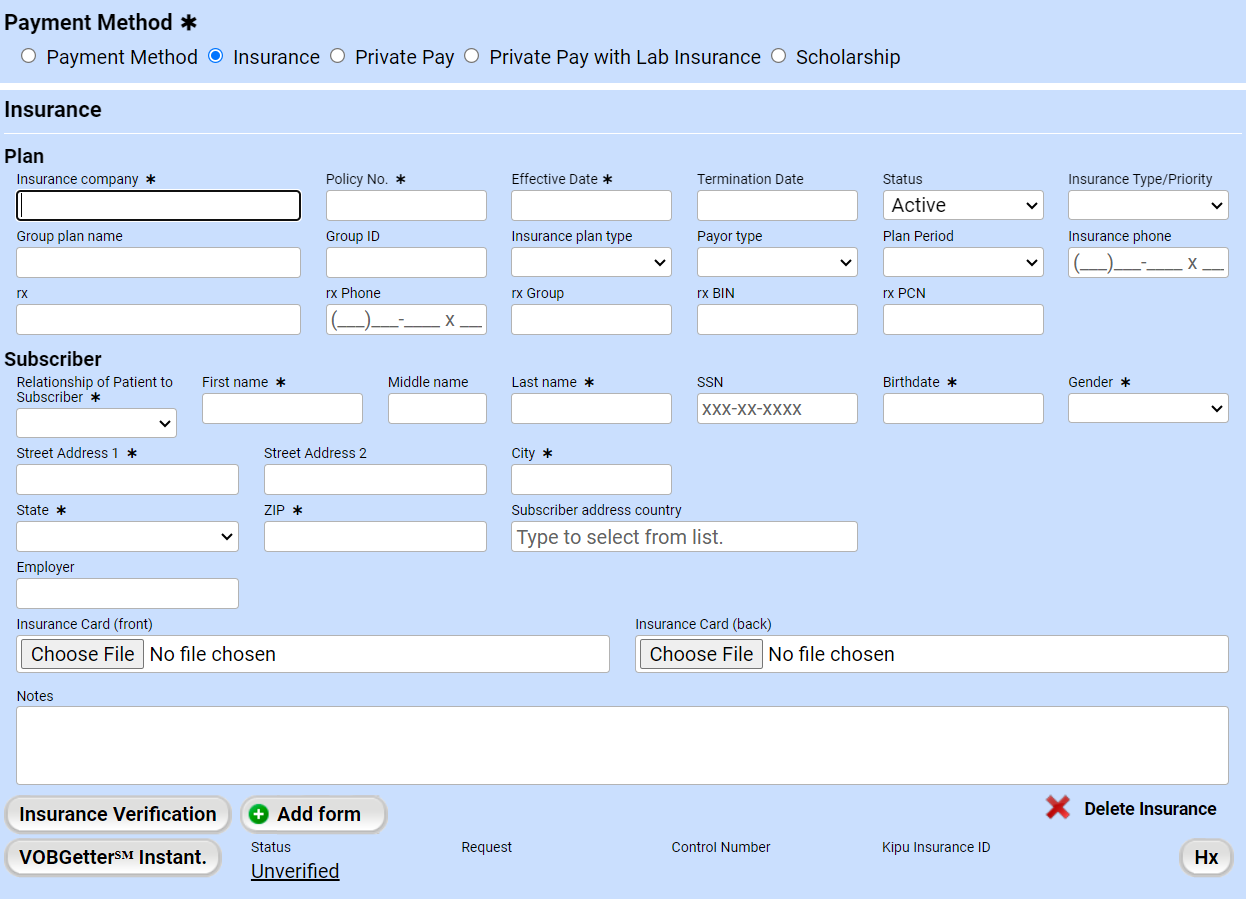
- Collect any missing or additional insurance information and re-verify VOB Getter if applicable. For more information to verify benefits using VOBGetter click here.
- Make sure to scan and upload a picture of the front and back of the patient’s insurance card. Click here to learn more about uploading a photo. Patients can also submit the required documents via the Patient Portal.
- Assign a specific pharmacy for eRx (skip this step if eRx is not active in your instance). While a patient is registered, the Pharmacy Search and Prescription Portal buttons will be grayed out until there is an admission date and an MR number is present on the facesheet. Click here to learn more about eRx [Rcopia].
- Click on Add Patient Contact and make sure to collect an emergency contact type.
- Add patient guarantor, guardian, or additional contacts (if applicable).
- Indicate any allergies and food restrictions. Click here to learn more about documenting allergies and food restrictions.
- Click Validate Form to validate the facesheet. Click here to learn more about the importance of facesheet validation.


Note: Many of the data points on the facesheet can be analyzed in Kipu reports. For more information about Kipu reports, click here.
Workflows for Telehealth
If the patient does not provide an email, the facility cannot invite them to the Patient Portal. In this case, the best practice is to utilize Workflow 1 [In-person] to accommodate the patient’s needs.
Let’s review the Kipu EMR best practice for collecting missing information during telehealth appointments.
- Patients can upload their own documents via the Patient Portal including files, insurance cards (front and back), patient ID, and patient photo.
- Once the patient uploads any file in the Patient Portal, the user will receive a notification and approve the patient’s files submitted in the Patient Portal. To learn more about Patient Portal click here.
- Click on Validate Form, to validate the facesheet. Click here to learn more about the importance of facesheet validation.

Comments
0 comments
Article is closed for comments.