The Discharged Patients tab is similar to the Current Census, in that it displays all patients that have pending signatures and due items (unreviewed orders, treatment plans, lab results, forms, etc.). However, these records belong to patients who have already been discharged, rather than ones who are on the current census.
Required Permissions: All users have access to Dashboard, but users with restricted access to certain patients will only be able to see the patients they are authorized to view.
Important: Additionally, because this tab can be renamed, based on facility preferences, the Discharged Patients tab may have a different name. For more information on customizing patient references, check out the Patient String section under Patient Options in this article.
To reach the Discharged Patients tab, click on Dashboard then Discharged Patients.
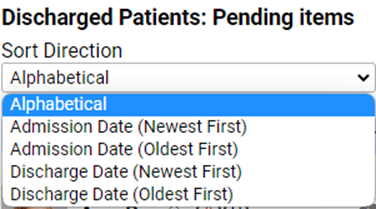
You can use the Sort Direction drop-down to sort patients by alphabetical order, or by admission date.
Discharged Patients
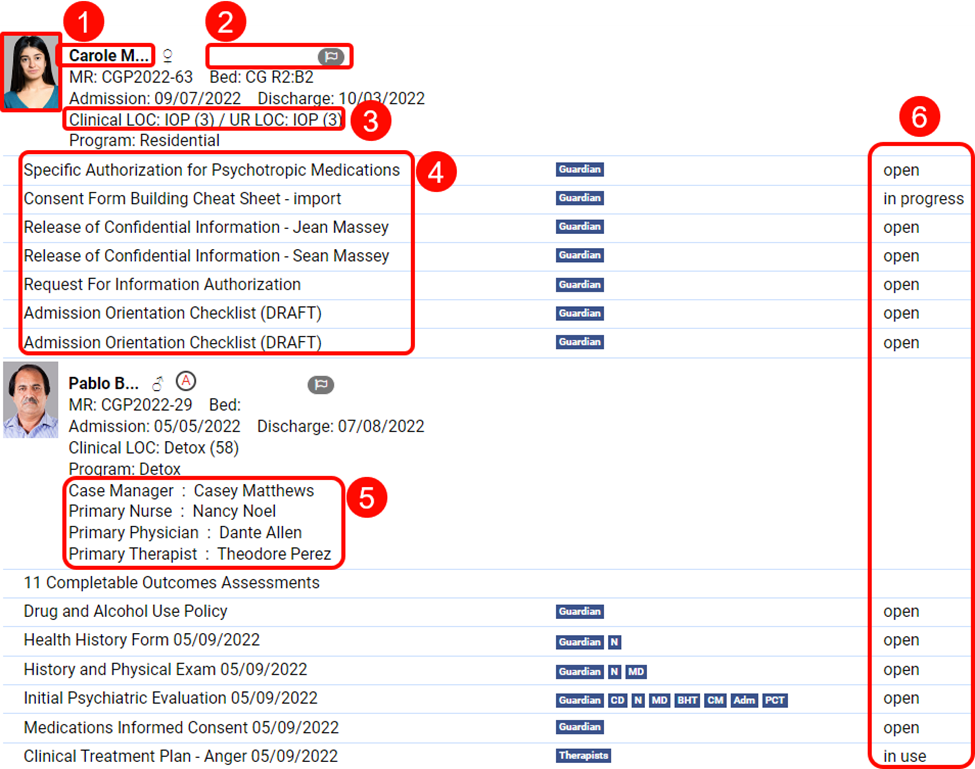
- From any of the three tabs, you can click on the patient’s picture or name to go to their records.
-
Clicking on any of the flags will open the pop-up which allows you to view them.
- Resolve: Will prompt you to explain the resolution in a text box and then resolve the flag.
- Acknowledge: Acknowledges that you have seen the flag and removes it from the flag counter but does not resolve it.
- Cancel: Cancels the flag.
- If your facility does not use Clinical LOCs and/or UR LOCs, they will not appear here. However, if your facility does use them, clicking on the Level of Care links will allow you to view their level of care history. You can simply review them and use either the x at the top right, or the Cancel button to exit, or click Print if you would like to print it out. For information on setting up LOCs, check out this article.


- Clicking on the title of a form will take you to that form, so that you can fill it out, review it, sign it, or perform any other needed actions. Outcomes Measurement forms and Meds Brought In documentation will both appear here if they are awaiting signatures.
- If the patient has an assigned care team, they will appear here.
- This column displays the form's status
- Open: All forms which have been added to a patient chart and opened but have not been filled out.
- In Progress: All forms which have been opened and begun, but not completed.
- Ready for Review: All forms which are awaiting review (for example, if a therapist is not licensed, they would submit a form as ready for review by a clinical director).
- In Use: These forms are specifically tied to treatment plans that are in use (e.g. that have been signed by both the patient and therapist).
The dashboard also displays any statuses added to the patient’s sheet. Statuses are customizable and can be set up by System Admin users under Settings > Patients. For more information on setting up statuses, check out this article.
Filters
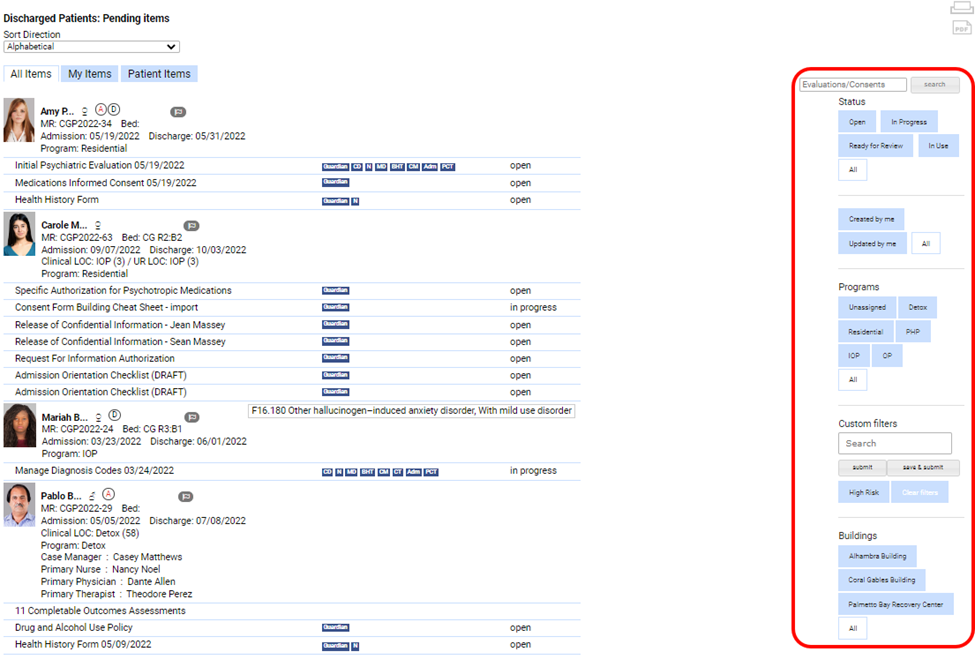
Filters are the same across all three Discharged Patients tabs.
-
Evaluations/Consents Search: Use the search field for specific form names like Golden Thread.


-
Status: You can view all forms in one or more statuses by clicking on the corresponding buttons.
- Open: All forms which have been added to a patient chart and opened but have not been filled out.
- In Progress: All forms which have been opened and begun, but not completed.
- Ready for Review: All forms which are awaiting review (for example, if a therapist is not licensed, they would submit a form as ready for review by a clinical director).
- In Use: These forms are specifically tied to treatment plans that are in use (e.g. that have been signed by both the patient and therapist).
- All: Shows all forms regardless of status.
-
Created/Updated by Me
- Created by Me: This button allows you to see all forms which you added to a patient chart, even if they were later updated or completed by another user
- Updated by Me: Allows you to see all forms which were added to a patient chart by another user but were last updated by you.
- All: Allows you to see all forms which you created or updated.
-
Programs: The Programs filters allow you to view forms of patients in specific programs like Detox, Residential, or any other programs your facility offers. Programs are created under Settings > Instance. Check out our article on setting up patient programs for more information.


-
Custom Filters: This section allows you to sort patients by the custom filters set up in Settings (for more information on enabling custom filters, check out this article). You will be able to use already created custom filters, and to create new ones here as well. To filter by an existing custom filter, simply click on the button.


- While any user can see and use custom filters created for their facility, only Super Admins can create them. To create a new filter, you can create new tags by simply typing them into the search field and add existing ones by typing them in and selecting them from the drop-down menu.


- Once you have added your desired tags, you can click the Submit button, if you do not wish to save the filter, and any matching results will appear. However, if you wish to save the filter for future use, click Save & Submit.


- You will be prompted to give the custom filter a name and click Save & Submit The new filter will appear below.


For more information on custom tags, see this article on Patient Tags & Custom Filters.
- While any user can see and use custom filters created for their facility, only Super Admins can create them. To create a new filter, you can create new tags by simply typing them into the search field and add existing ones by typing them in and selecting them from the drop-down menu.
-
Buildings: The buildings section will display all Locations in your instance, if you have any (for example, outpatient facilities will not have buildings). Click on the name of a specific location to view the forms and documents in that location. If you need to create Buildings, check out this article.

All Items
The All Items tab shows all forms that are open, in progress, or in need of review attached to discharged patients. You can use the filters discussed earlier in this article to filter and sort which forms you view.
My Items
The My Items tab shows you all the forms which you have the correct permissions to edit or complete. (For example, if you are a nurse, the My Items tab will show you all items which need to be signed off on by a nurse.)
In addition to the usual print and PDF options at the top left, the My Items tab here also has options for creating PDF packages, Casefiles, and Transfer documentation.
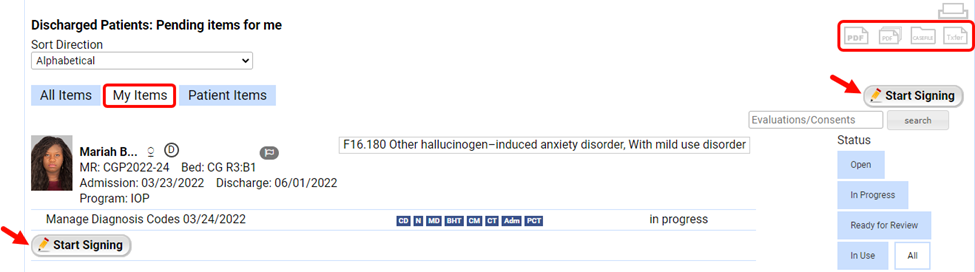
You can use the filters on the right (discussed at the beginning of this article) to show, and/or sign, only certain types of forms, or only forms fitting certain criteria.
- You can sign all documents belonging to a specific patient by clicking on the Start Signing button below the patient on the left.
- Sign your name in the Add Signature pop-up that appears. If you sign your name incorrectly, click Clear. Once your signature is entered, click Submit.
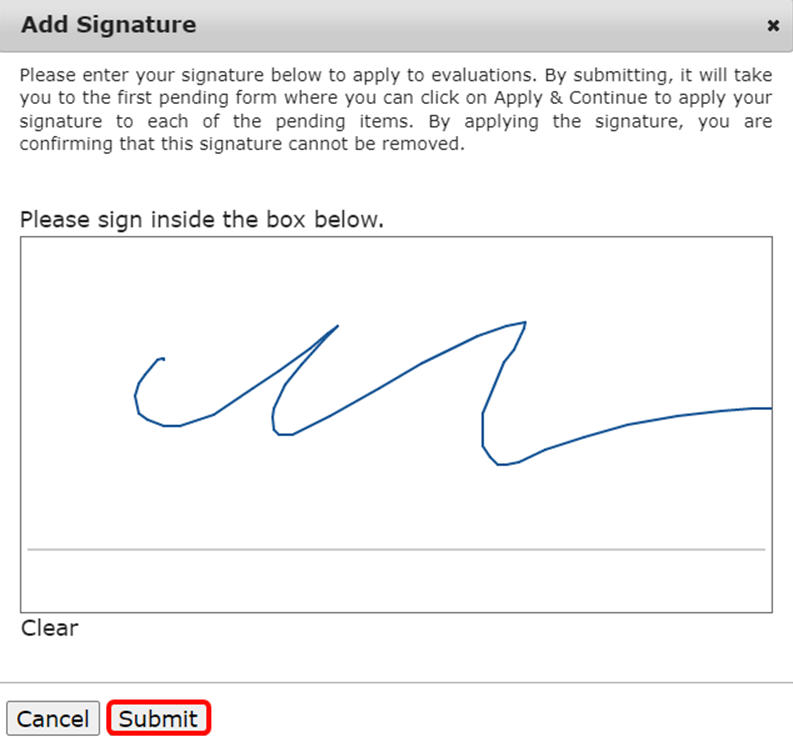
-
You will then be taken to the form, where you can review it and make any necessary changes. Once done, scroll to the bottom of the form.

- You can use the buttons to update, validate, add signers, or print. To apply your signature and move on, click Apply & Continue. You will be returned to the My Items tab.
- You can click on the Start Signing button on the top right, above the filter options to start signing all documents awaiting your signature.
- Once again, you will begin by signing your name in the Add Signature box. However, this signature will be added to each form, and you will not have to keep signing your name.

- When you complete the form and click Apply & Continue as you did above, instead of being returned to the My Items tab, you will be taken to the next form that requires your signature.
Additionally, if you have set up a signature attached to your user profile, you can simply sign by entering your pin. (For instructions on how to set up your profile so that you can sign by entering a pin, see this article.)
Please note that if the item is still pending additional signatures, it will still appear in your Discharge Patients tab.
Patient Items
The Patient Items tab shows all documentation attached to a discharged patient's chart which needs to be signed by the patient or a guardian (Consent for treatment forms, etc.).
Click on the form titles to navigate to the forms.
While you certainly can have patients sign documents from this area of the dashboard, it is best practice to navigate to the patient’s chart and have them sign forms there, as it is the best way to ensure that the patient only sees information they are meant to see. See this article for more information.
For instructions on closing a patient's chart, check out this article.
Comments
0 comments
Article is closed for comments.