The Physician Review tab displays all physician’s orders, which can be reviewed and signed in the My Orders, All Orders, and Lab Test Results tabs.
Required Permissions: This tab is available to Doctors and Super Admins
Check out the Labs section for more information on lab orders, creating medical test profiles, and more.
To navigate to the Physician Review tab, click on the Dashboard tab, then click on Physician Review.
All tabs include the option to print and download as a PDF.
My Orders
When a physician/doctor navigates to the Physician Review tab, they will see the My Orders tab, which shows all orders divided into two tabs: Standard (all regular orders) and Medical Test Orders.
Important: If you have the MAT feature enabled, there will be an additional MAT Orders tab as well. For more information, see this article.
Standard
The Standard subtab displays all regular orders created or requested by the doctor/physician and allows the physician to sign all regular orders in an efficient manner.
- Medication: Filter orders by medication
- Patient: Filter orders by patient
- Ordering Physician/Reviewing Physician: Filter orders by ordering or reviewing physician
- Provider: Filter orders by provider
- From/To Date: Filter orders by from and/or to date
The order items appear below the filters.
-
Patient: The Patient column contains the patient's name, patient MR number, sex/gender, and allergies. This information is taken from the patient chart. Clicking on the patient will take you to the order.
-
Important: If there are any warnings associated with the patient, they will appear in red text below the information in the Patient and Order columns.
-
Important: If there are any warnings associated with the patient, they will appear in red text below the information in the Patient and Order columns.
-
Order: The Order column shows the order title and justification, drawn from the order itself. Clicking on the order will also take you to the order.
-
Important: If the order title has STOP as a prefix, together with red text, it means the order has been discontinued or changed.
-
Important: If the order title has STOP as a prefix, together with red text, it means the order has been discontinued or changed.
- Date: Displays the start date of the order. It also displays the initials of the user who made the order and the date on which it was made.
- Status: Displays the name of the ordering doctor and status.
-
Inventory: If your facility has the Inventory feature enabled, there will be an additional column, which displays any patient or facility inventory information for the order.
Perform the following steps to sign unreviewed orders
- Enter any notes (if needed) and add your signature, click on the Sign Unreviewed Orders button.
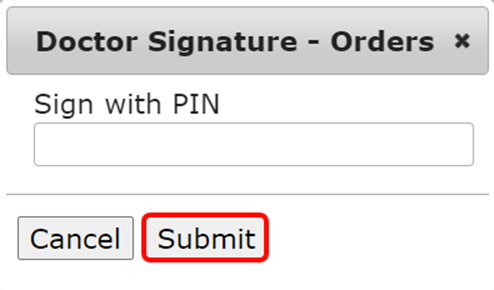
- Sign your name or enter your pin, then click the Submit button.
-
As with any documentation, you can sign using a PIN, your finger or stylus on a touch-screen, a compatible Topaz or Scriptel signature pad, or with your mouse.
-
Clicking on the patient or order will take you to the following screen.
- Click Back to unreviewed orders at the top or bottom of the order will return you to the My Orders > Standard tab while clicking Previous or Next will take you to the previous or next orders on the list.
- Clicking on the Review Signature button opens the Order Review Signature window. Sign your name in the box, and click Submit to review.
- To add annotations, click on the + Annotate button. For detailed instructions on annotations, check out this article.
Medical Test Orders
The Medical Test Orders tab shows all medical test orders created or requested by you which require review and signatures.
The top section gives you a number of options to filter your medical test orders.
- Search: Search all your medical test orders by the entered criteria. You can use the search term in conjunction with the status and date range fields.
- Select Status: Click on the field to open the drop-down menu with all statuses listed, and choose the desired status. You can use the status filter in conjunction with the search and date range fields.
-
Select Date Range: Clicking on the icon, field, or drop-down arrow will open the calendar. Select one of the existing date range options from the left, or choose Custom, and click on the start date and end date on the calendar. Then click Apply. You can use the date range filter together with the status and search options.
- Search: Click on the Search button to search by the options entered above.
-
Discontinue Selected: Choose the desired orders and click Discontinue Selected to discontinue those orders, or click on the drop-down and click Discontinue All to discontinue all your medical test orders. Regardless of which option you choose, you will see a message at the top of your browser prompting you to confirm your request, or cancel it.
-
Review All: If you wish to review all your orders, click the Review All button. If you click on this button, you can add any notes, and sign your name.
- Important: Once you search using your filters, this button becomes Review Filtered and clicking it will allow you to review all orders that meet your entered criteria. Additionally, to support the medical necessity of the ordered tests, it is important to record any observations in the notes section.
Each of the following columns can serve as a filter by clicking on the title. The down arrow beside the column title (here beside Created At) indicates which column is determining the sort order.
- Patient: This column contains the patient's name, as entered on their chart. You can click on the patient's name to go to the medical test order under Labs.
- Description: This column contains the test name, where it was ordered from, and whether or not it is expired. You can click on the information in this field to navigate to the medical test order under Labs.
- Created At: The date and time the order was created appears in this column.
- Ordered By: The name of the ordering physician who requested or created the order appears here.
- Start Date: This column contains the order's start date.
- Duration: This column displays the order's duration.
- Frequency: This field shows the scheduled order frequency, whether they're random, one-offs, reoccurring, or scheduled.
- On Admission: This field indicates that the requisition needs to be collected upon admission, regardless of schedule.
- On Discharge: This field indicates that the requisition is collected upon discharge, regardless of schedule.
-
Status: There are five statuses that you will see in this field.
- Active: The order is active.
- Pending Order Review: The order is awaiting review and signature.
- Pending Discontinue Review: The order is awaiting review and signature.
- Reviewed: The order has been reviewed.
- Discontinued: The order has been discontinued.
- Discontinue: Click on the thumbs-down icon to discontinue. A message will display prompting you to confirm or cancel the request.
A white background indicates that the order is active, a yellow indicates that the order is unavailable (for example, the lab no longer offers that test, the order has expired, etc.), and a red background indicates that the order has been discontinued by a user.
If you click on the patient's name or the order title, you will be taken to the same view that can be reached by navigating to Labs > Medical Review Orders (for more information, See the Individual Sign Orders section of this article). The process of annotating and reviewing the order is the same, but clicking on the Medical Test Orders text will return you to the Medical Test Orders area of the Dashboard, not the Labs section.
All Orders
The All Orders tab houses all Standard and Medical Test orders regardless of the ordering physician.
Important
As with My Orders, if your facility has the MAT feature enabled, there will be an additional MAT Orders tab here as well. For more information, see this article.
Standard
The Standard tab looks and behaves in the same manner as the My Orders Standard tab. You will not be able to bulk sign unreviewed orders unless the option Allow to Sign All Orders is selected under the Doctor permission in Manage Users for your profile.
If it is selected, you will see the Sign Unreviewed Orders button.
Enter your pin or signature to sign off on all orders.
If you do not have access to the Sign Unreviewed Orders button, you can still view all orders here, but will have to click on the patient or order information and navigate to the patient chart to make changes.
Medical Test Orders
The Medical Test Orders tab only differs from the My Orders > Medical Test Orders tab in that it shows all medical test orders requested in your facility, regardless of ordering physician. 
Lab Reports
If your organization has the Labs featured turned on, you will find the results from Lab orders made by members of your facility awaiting physician’s review here.
The results with a white background are determined by the lab to be normal results, and can be signed off all in one page at once, simply by clicking Sign Negative Results. The ones highlighted in red have at least one positive value, and/or result that the lab has flagged as abnormal, and need individual review.
- Search: Search all lab orders by the entered criteria. You can use the search term in conjunction with the status and date range fields.
- Select Status: Click on the field to open the drop-down menu with all statuses listed, and choose the desired status. You can use the status filter in conjunction with the search and date range fields.
-
Select Date Range: Clicking on the icon, field, or drop-down arrow will open the calendar. Select one of the existing date range options from the left, or choose Custom, and click on the start date and end date on the calendar. Then click Apply. You can use the date range filter together with the status and search options.
-
Any Result: Use this drop-down to choose what kind of results you wish to view.
- Results for review: Will show all results that require reviews.
- Everything normal: Will show all results that returned normal results and do not require review.
- Any result: Returns all results.
- My Reports: My reports shows reports ordered by you. If you choose All reports from the drop-down instead, you can view all reports.
- Search button: Click on the Search button to search by the options entered above.
-
Review All Negatives: The Review All Negatives button allows you to sign off on all reports that returned normal and do not need reviews.
- Important: To support the Medical Necessity of the ordered tests, it is important to record any observations during the reviewing process.
If you click on the title of any column, you can sort the results by that column. The arrow beside the column title indicates that the results are filtering by that column, and the direction of the arrow indicates whether it is filtering in ascending or descending order.
- Patient: Displays the patient's first and last name.
- Specimen: The specimen number for the sample sent to the lab.
- Accession No: This number is the unique identifier for the lab result.
- Specimen Source: The specimen kind (urine, blood, swabs, etc.).
- Results for Review: The number of results contained in a single order.
- Lab: The name of the lab that performed the tests.
- Created At: The date and time the lab report was created.
- Reported At: The date and time the order was placed.
- Collected At: The date and time the sample was collected.
-
Status: The status of the lab order
- Assigned: The result was assigned to the patient's chart and is pending physician signature/review. Click here for instructions on signing results.
- Reviewed: The result was assigned to the patient's chart and has been signed/reviewed by the physician.
- Unassigned: The result did not automatically match to an existing patient chart and must be assigned to the patient manually.
- Download: Click on the download icon to access a downloadable PDF file of the selected order.
If you click on the patient's name or the specimen number, you will be taken to the order details view, which is the same as the one you would see if you navigated to Labs > Physician Review > Lab Reports, and then clicked on that order. To review the report, click on the Review button.
Enter any notes in the Review Lab Report window, then sign and click on the Submit button.
Important: To support the Medical Necessity of the ordered tests, it is important to record any observations during the reviewing process.
Once the result is signed, click on the First, Previous, Next, or Last buttons to navigate to the selected results, or click on the Lab Reports text to return to the Lab Reports tab. 
 Check out this article for more information on test requisitions, and this one for more information on unassigned reports.
Comments
0 comments
Article is closed for comments.