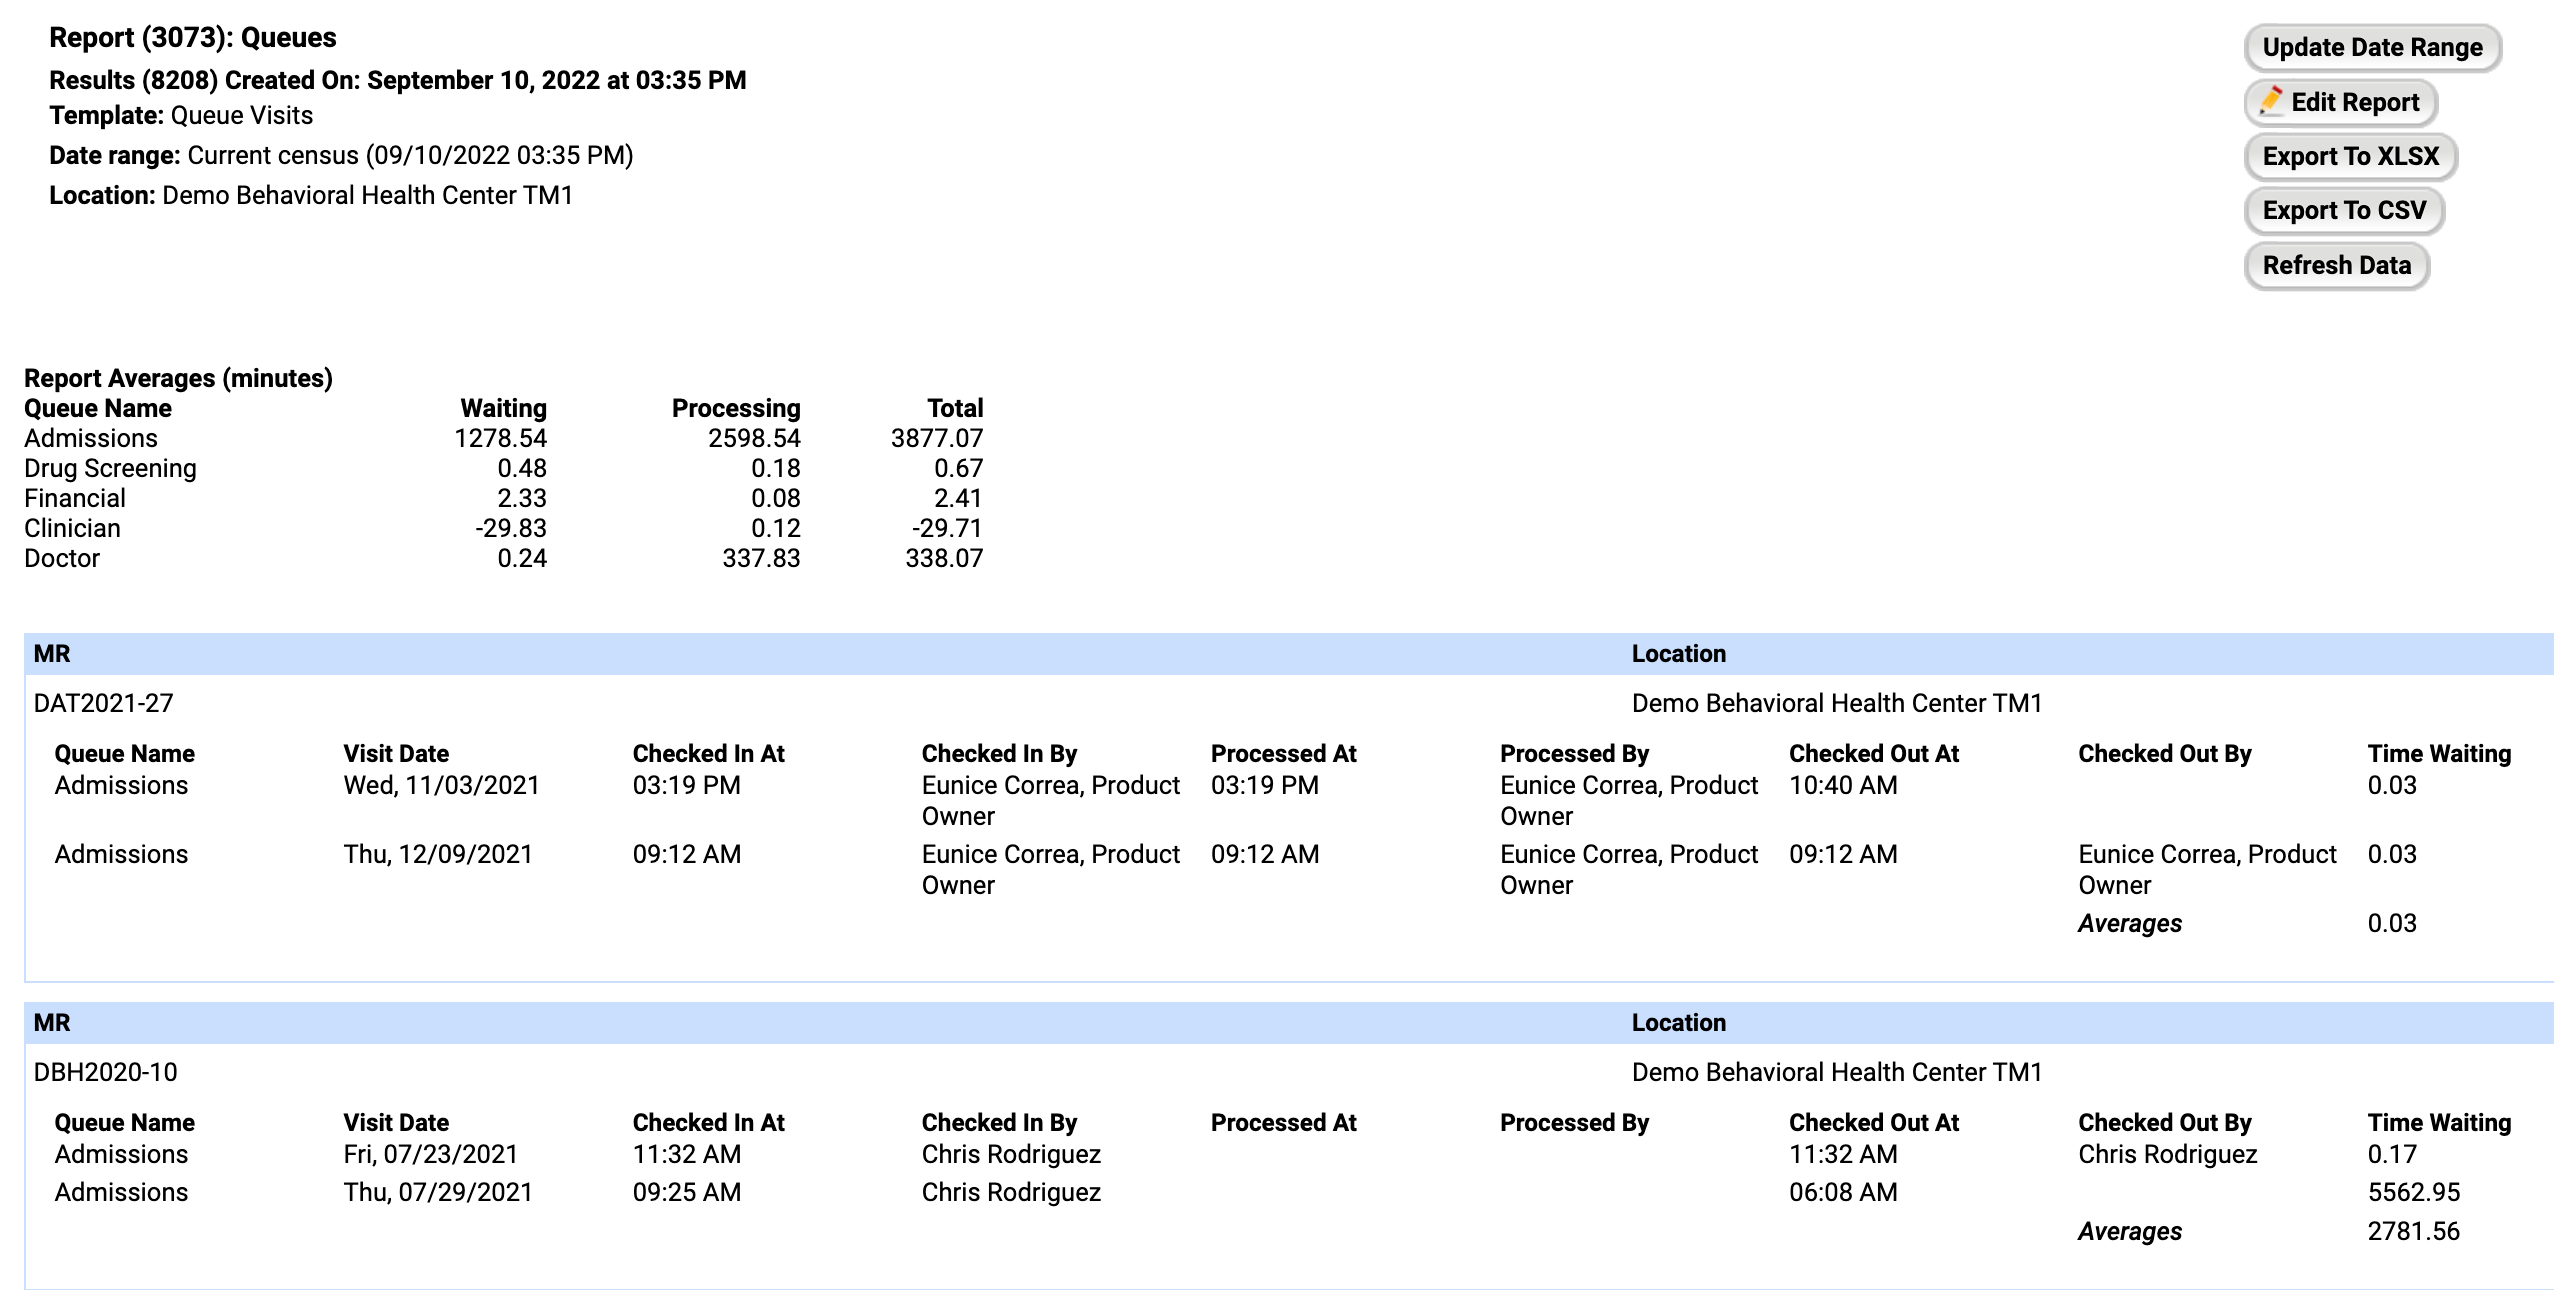
Use the Queue Report to view average queue times by location and queue type, including patient visit details like check-in and check-out times, processing times, waiting times, and total duration. This report is only available for organizations using the Queues feature.
This report provides insight into overall wait times which can help facility administrators to understand which sections of the process could benefit from efficiency measures.
Default Data Points
This report contains the following default data points:
- Visit Date
- Checked In At
- Checked In By
- Checked Out At
- Check Out By
- Time Processing
- Time Waiting
- Total Time
How to Create a Queue Report
Super Admins, Records Admins, and users with Manage Reports feature can build the following report:
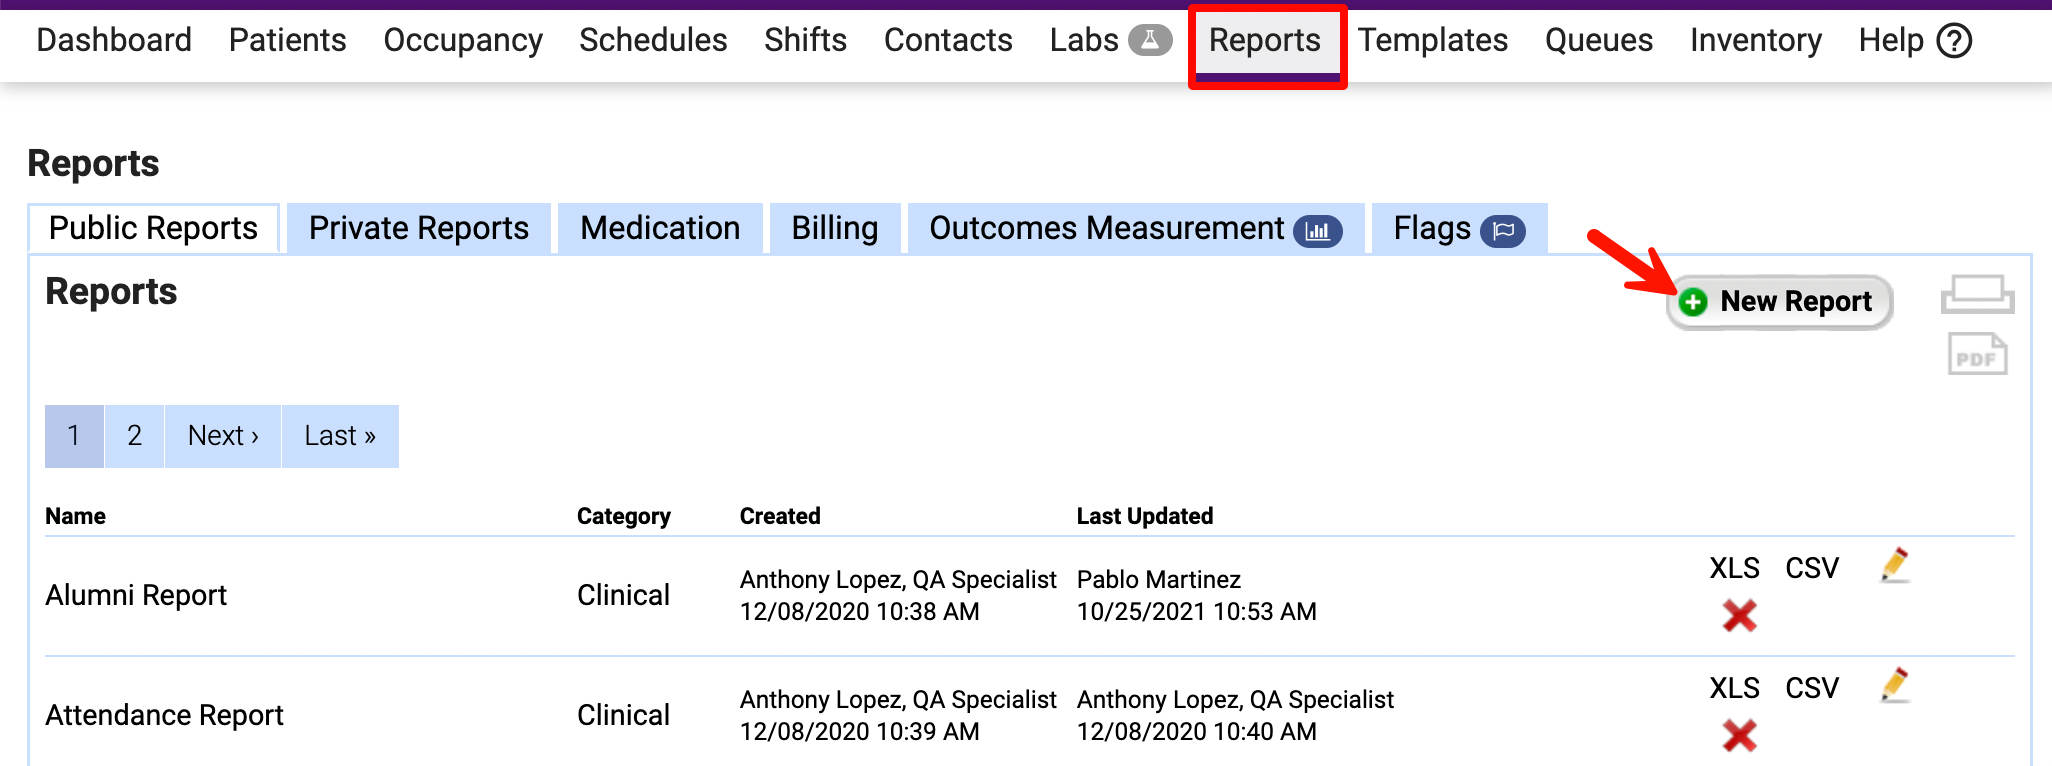
- Open the Reports tab and click New Report.
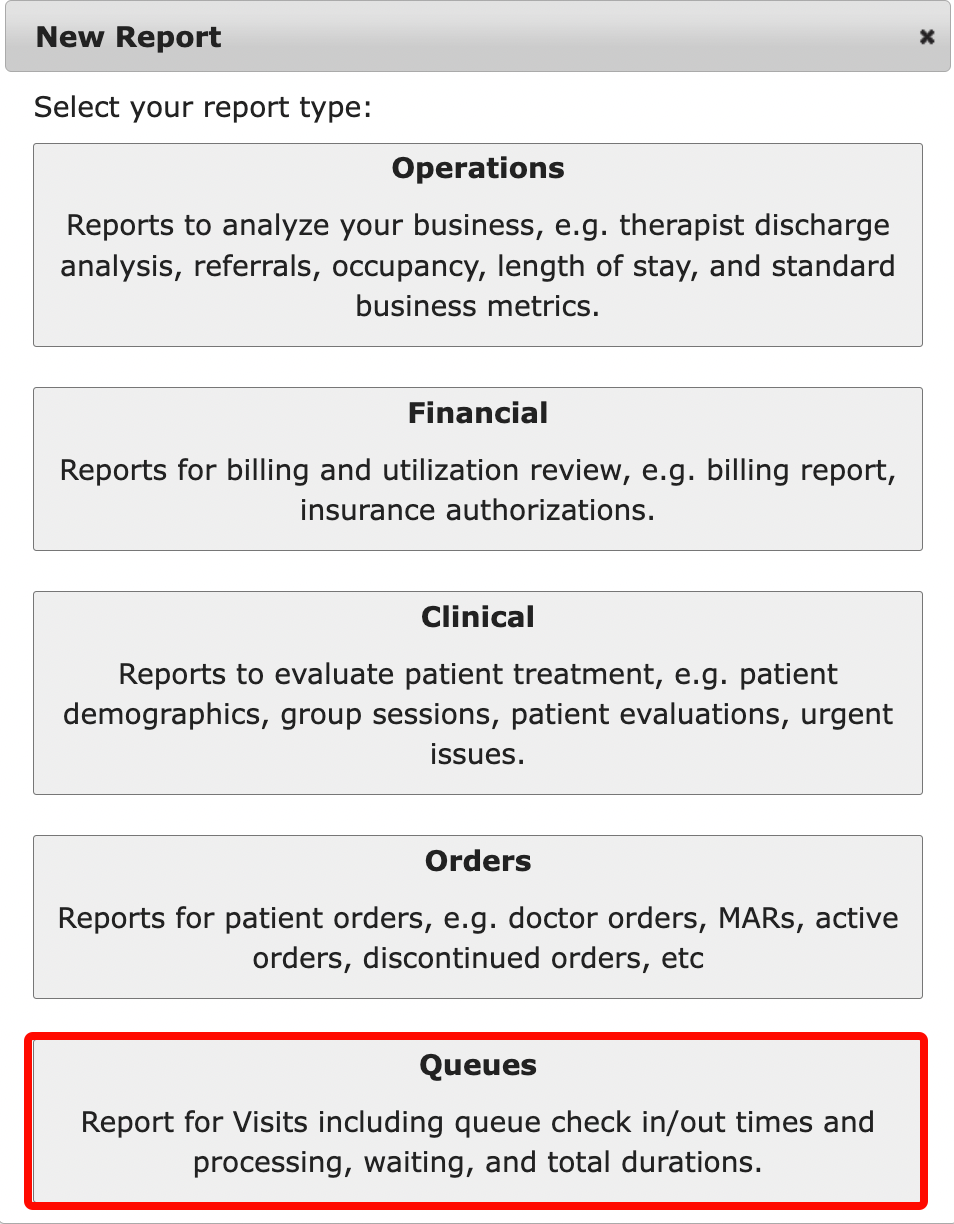
- Select Queues for the report type.
- Enter your reporting parameters.
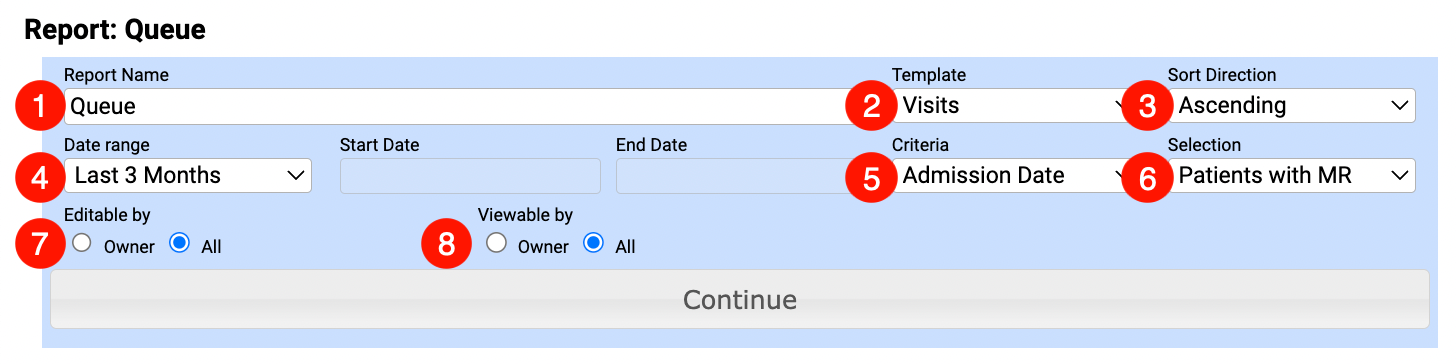
- Report Name
- Template: Visits is the only Queue Template to date.
- Sort Direction: Select Ascending or Descending for the report order.
- Date Range: Select a date range for this report. Start Date/End Date is only available when a Custom date range is selected. Current census pulls all data related to patients in the current census.
- Criteria: No selection is needed here. While this drop-down appears to have several options, once you click Continue, this is configured to show only Completed queue visits.

- Selection: Choose to include Patients with MR (admitted), Patients without MR (not admitted), or All Patients.
- Determine who can edit the report using the Editable by radio buttons.
- All: The report can be edited by any user who has access to it.
- Owner: The report can be edited by the report's creator or a Super Admin that has a direct URL to the report.
- Identify who can view the report using the Viewable by radio buttons.
- All: The report is available under Public Reports for all users who have access to Reports.
- Owner: The report is available under Private Reports for the current user, or by using the direct URL.
- Click Continue.
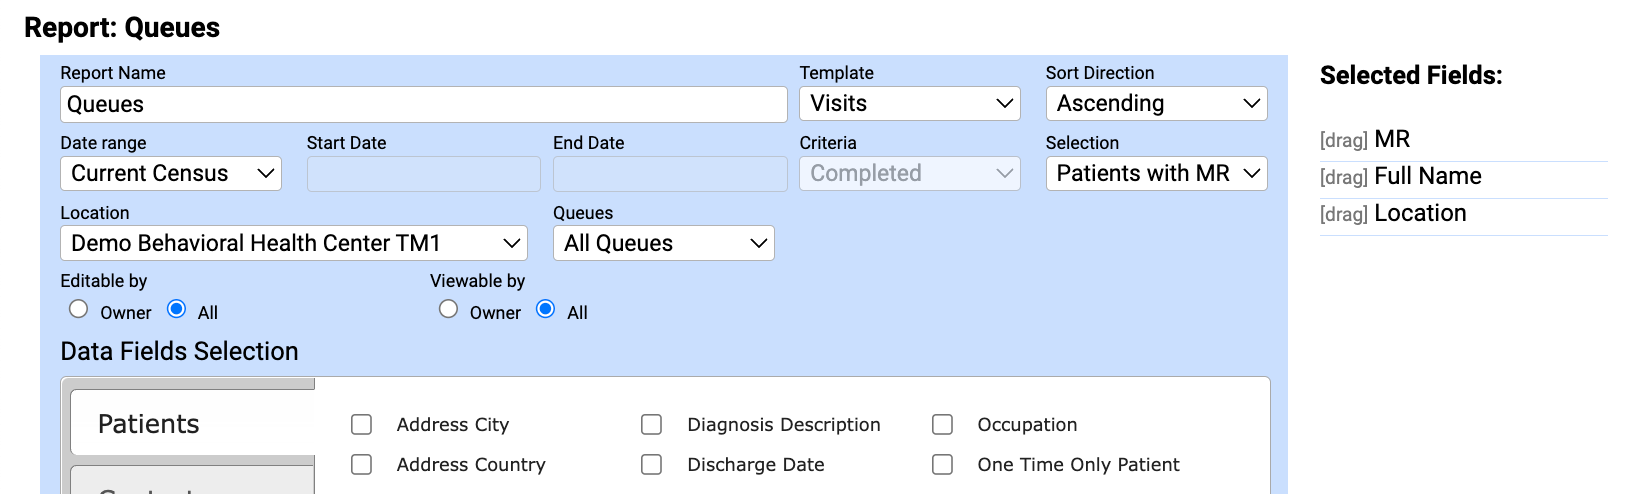
- Two additional data points appear for selection:

- Location: Select one or all locations to report on.
- Queues: Select one of your custom queues or report on all queues.
- Use the Data Fields Selection to include each field you'd like to see on the report like MR Number, Full Name, Location, etc. The order of the fields selected here is how the fields will appear on the report, with the first field used to group the report. Use the [drag] indicator to reposition as needed.
- Click Run Report to view your results. The top of the report provides an overall summary of all Queue durations with individual results below.
- From here, you can edit or export the report for further manipulation.
Comments
0 comments
Article is closed for comments.